Acrylic pouring is one of the most rewarding forms of acrylic painting for creative minds and those who want to have a little bit of fun.
We’ve taken the liberty to show you a few fun acrylic pour cells techniques in this how to acrylic pour painting for beginners tutorial. Follow along step-by-step, photo-by-photo if you would like or use our guide as nothing more than a leading light and carve your own creativity into your canvas as we go 🙂
Different Acrylic Pouring Techniques
Learning how to acrylic pour is not really about mastering one technique but rather an everlong list of different creative uses of this medium. Simply put, there is no end to the imaginative creativity in acrylic paint pouring.
Thank you to Olga for her help in putting this tutorial on all the different acrylic pour techniques together. She is a great artist and excellent acrylic pour art resource. Please consider supporting her by purchasing some of the supplies you see in this tutorial with this link.

Here are just ten of the endless Acrylic Pouring techniques you can try:
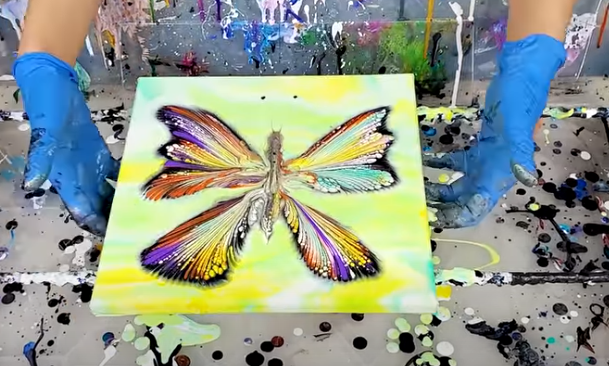
Butterfly Chain Pull
Start with a chevron-type design. You don’t have to follow ours below exactly. Matter of fact, your background design can consist with whatever clever art you want. Just make sure their are several light colors that will mix well.
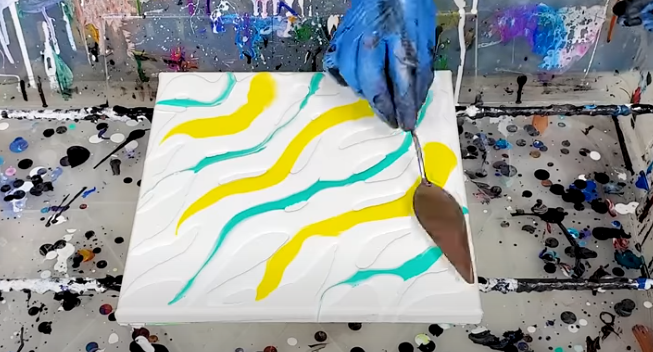
Use a spatula to smear the colors together.
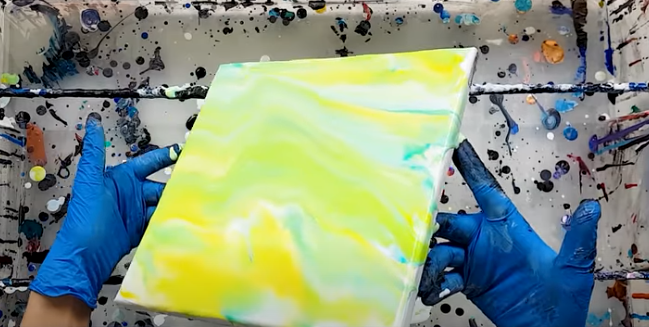
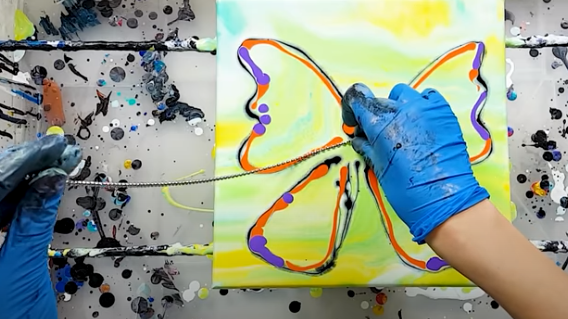
Allow it ten to twenty minutes to dry before using a tube of dark colored acrylic paint to make a butterfly outline.
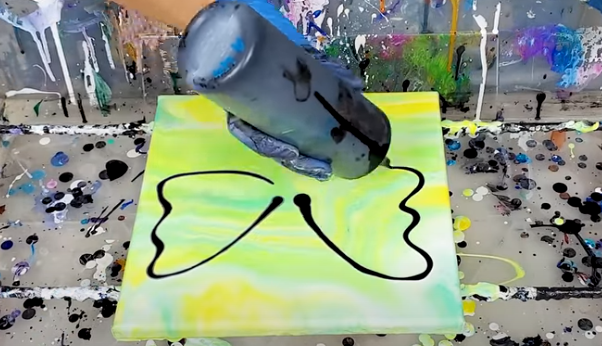
You may choose to follow up your outline with another more flamboyant color. This choice is up to you.
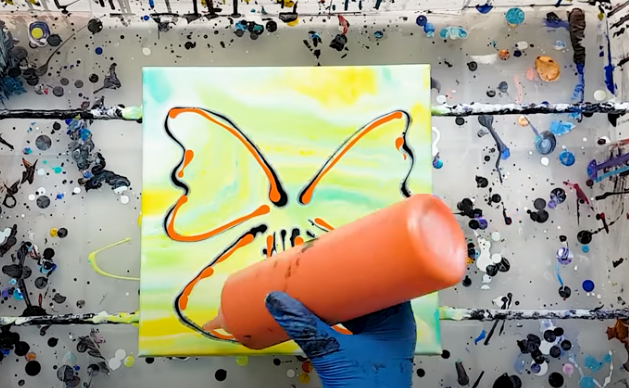
We added purple, too, for a creative touch.
Now, use a bead necklace for this next step — or a chain — or anything you can find that can create a precision drag.
Hold the chain above your painting and slowly allow it to trace your butterfly outline little by little.
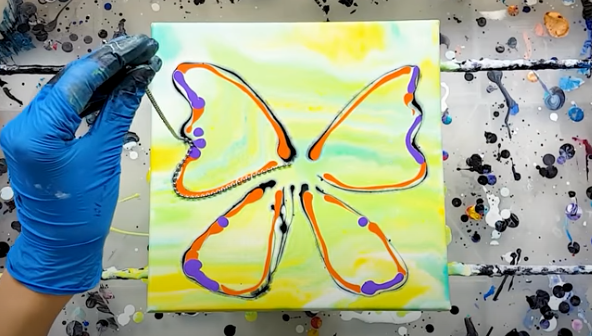
Once you’ve reached a point in your artwork where you can easily pull the beads in one direction to create a consistent pattern, do so slowly as seen in the photos above and below.

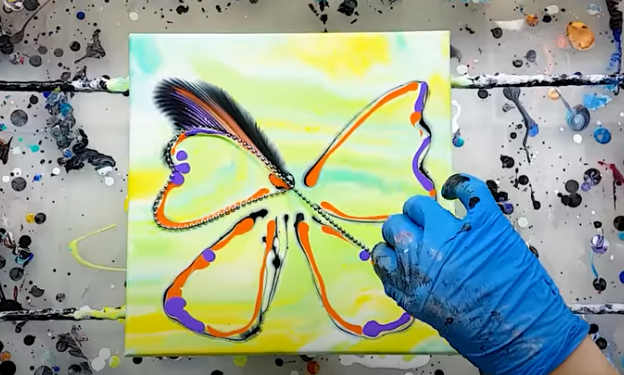
Make sure you pull the chain to the center of your work, in this example, or if you are making several chain pulls in your art, make sure they all pull in the direction of one unique point. This will create a sense of preparedness and not random abstract.
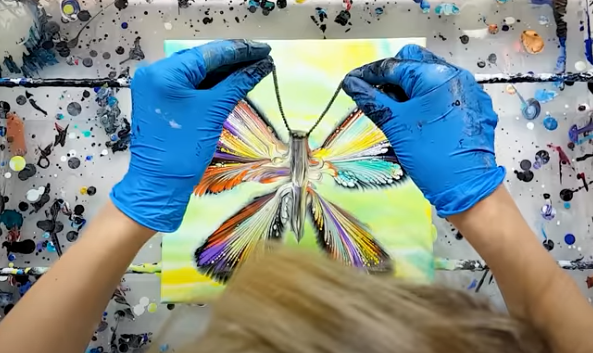
For your butterfly, repeat this step for the other wings until you have your finished piece. You might find that rinsing your chain or beads after each pull creates a cleaner effect.
At the end, you’ll have a considerable amount of paint pooled in the center on your butterfly’s body. Consider doing something creative with this as we’ve done where we dragged it out with the chain.
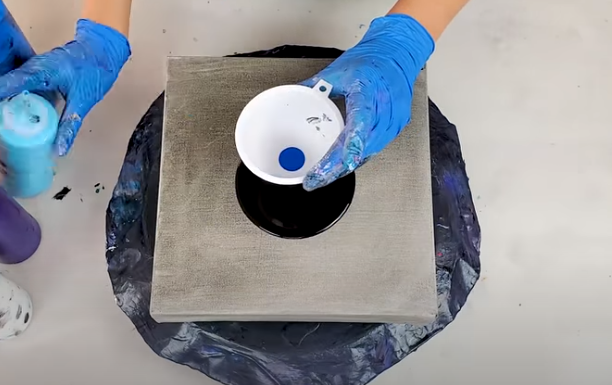
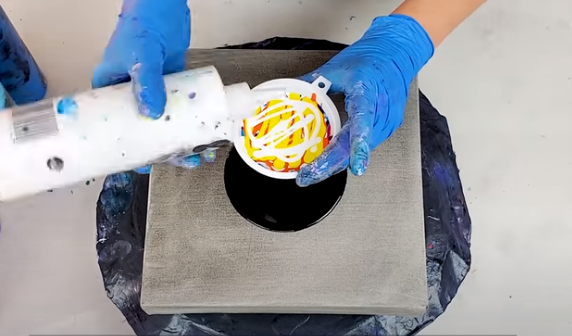
Funnel Ripple Pour
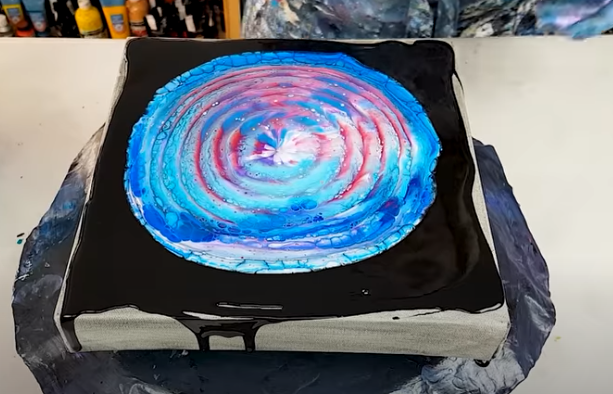
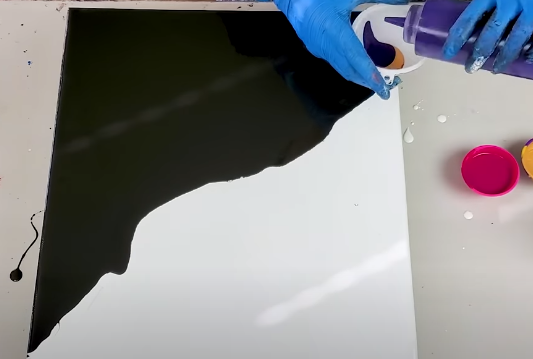
For the funnel ripple pour, start by pouring black paint in the center of your canvas. The paint will automatically spread, so try to keep your pour centered the whole time.
Then, use a funnel to do the next steps. Start by blocking the hole of your funnel with the canvas. Do not let paint escape prematurely underneath. Keep it held firmly to your canvas.
Then, begin adding paints to the funnel. As you can see, we started with blue.
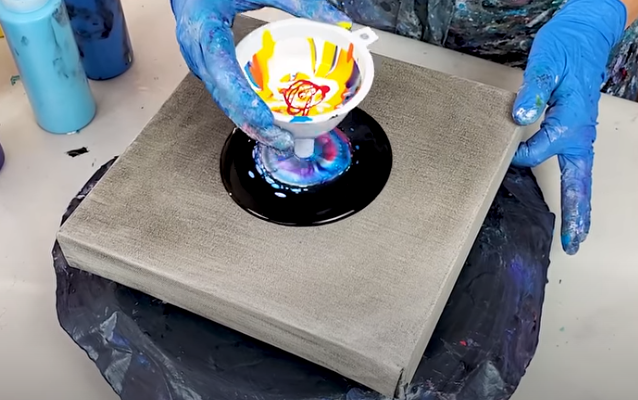
Continue adding various colors without rhyme or reason. We tend to stick to bright colors as it achieves the best effect in our opinion.
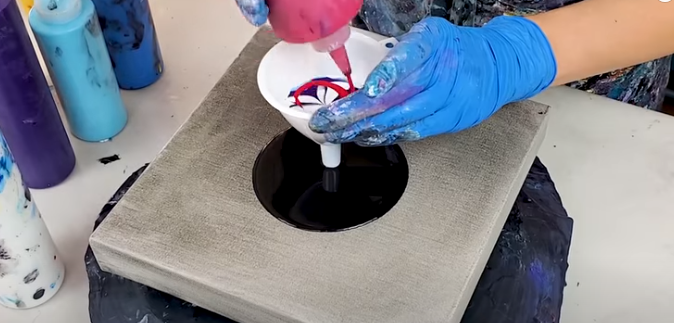
The colors don’t mix inside the funnel. This is because of their particular acrylic paint properties. Just be certain to hold the funnel still and flat against the canvas.
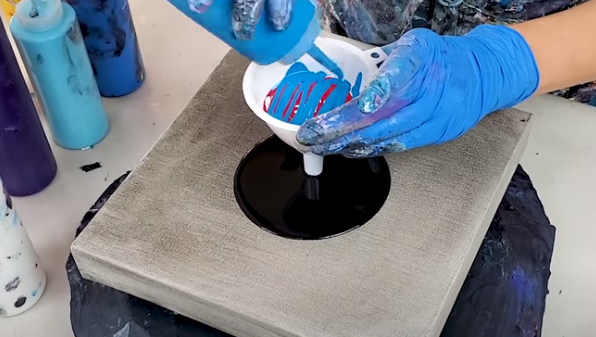
We like to add white as it is a good blending color.
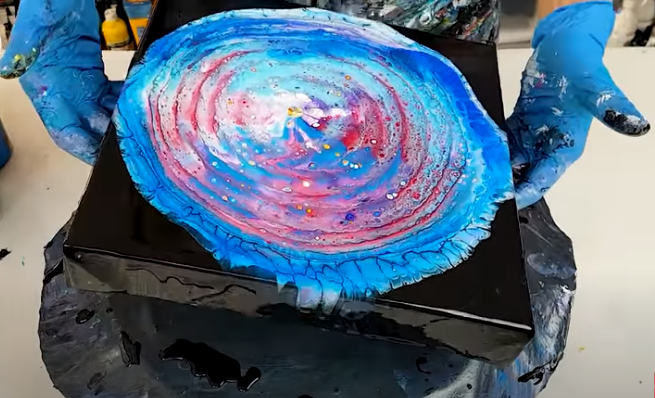
Once you have all the colors you want added, raise the funnel just hovering the canvas. The action happens fast, so be ready.
Create different effects by raising, lowering, and dabbing the funnel to the canvas. But keep it centered!
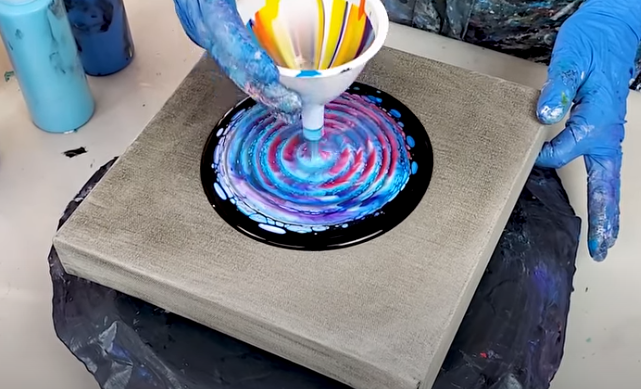
You can raise the funnel the more the paint runs out of it. This will give you a fun ripple effect.
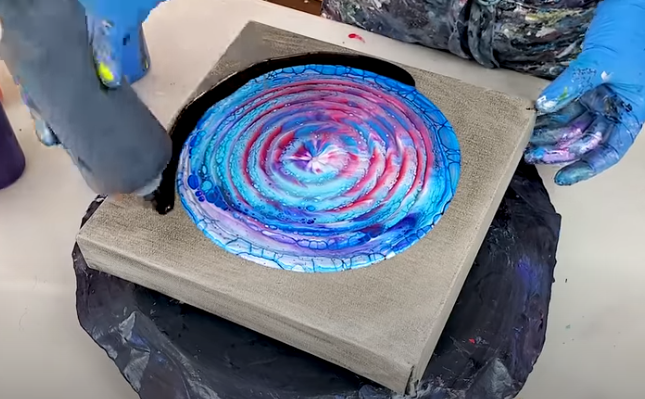
We’ve chosen to quickly add a black, thick coat around the galaxy-looking effect you’ve created.
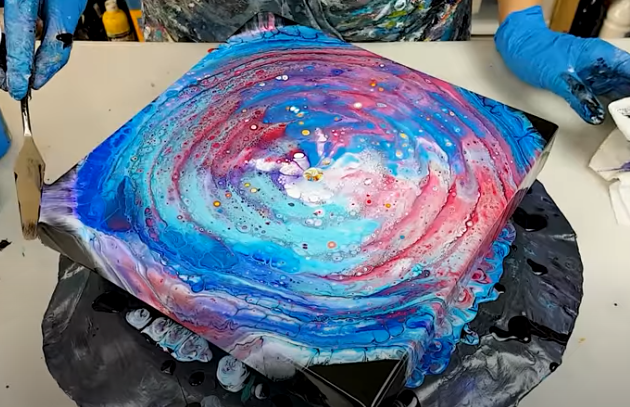
Next, the choice is yours with what you do with it. We’ve decided to use a tilting technique to get the paint to run randomly to the edges.
To get a sliding effect all the way to the corners, we use our trusty painting spatula.

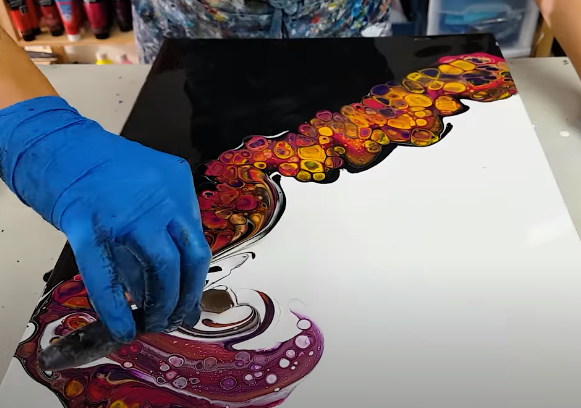
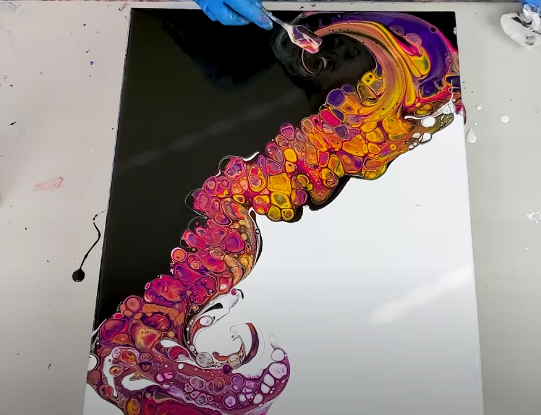
Traveling Ring Pour
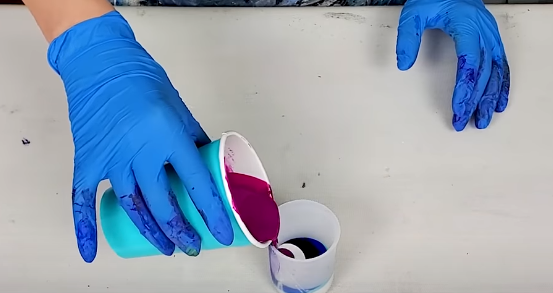
Similar to the funnel, for the traveling ring pour, we will fill a small cup with various colors of paint.
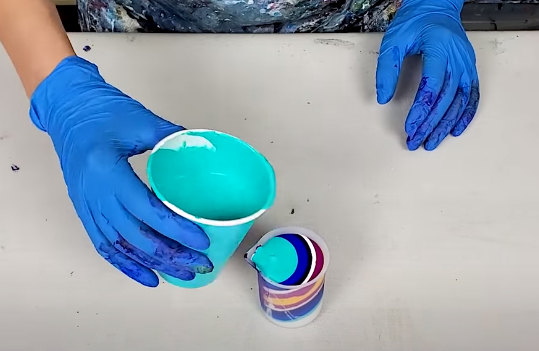
We’ve pre-painted a purple ‘border’ around our canvas. This is not necessary and is totally up to you!
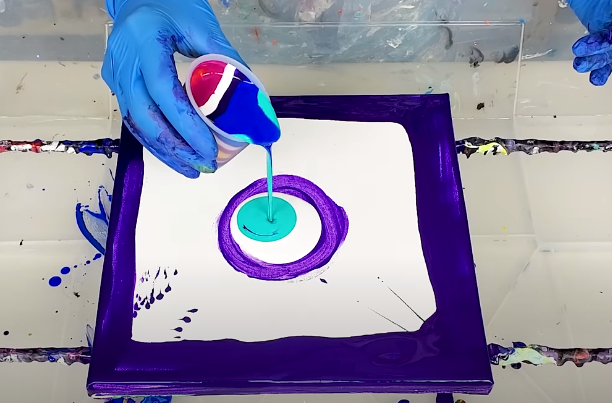
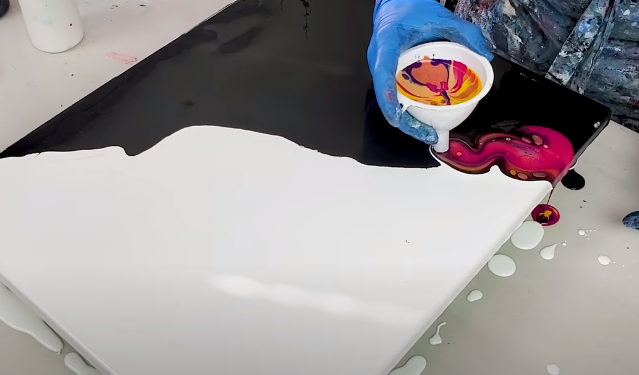
Next, we slowly start pouring our paint mixture.

Keep your pour on the same point at the beginning. We’ve found this to give the best effect. Later on (as you see below) you can start to move your pour for your desired effect.
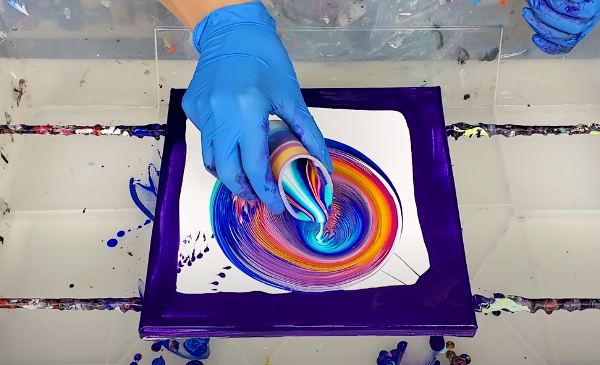
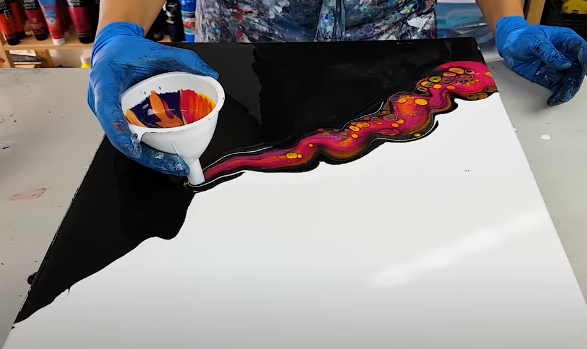
When the cup is empty, we begin tilting similarly to the funnel tutorial above.
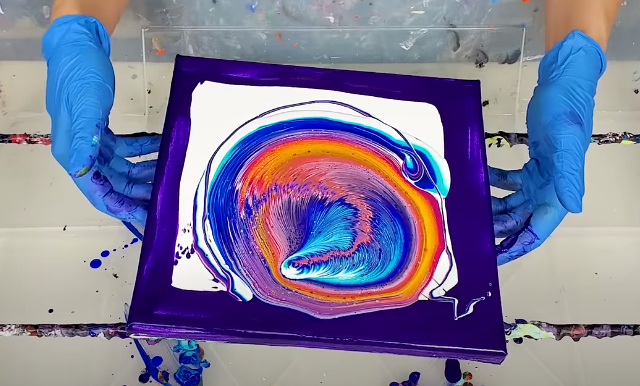
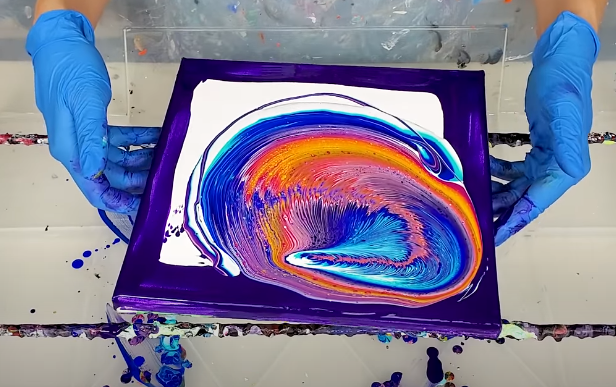
Tilt all the way to the edge if you’d like! And voila!
Center Swipe + Tilting
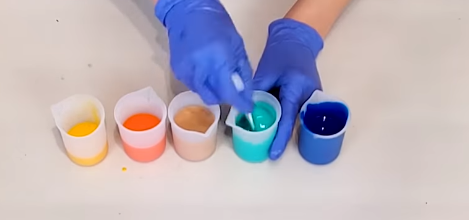
The center swipe technique begins by filling cups with various colors of paint.
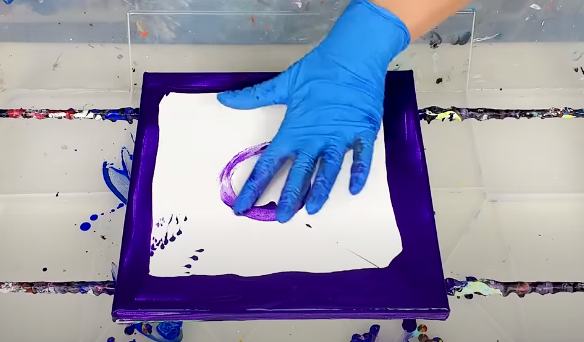
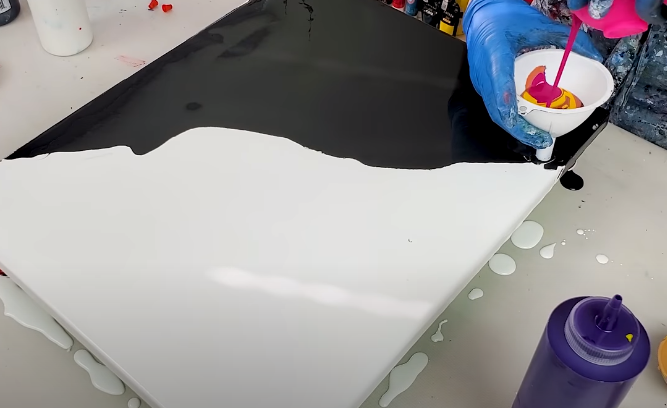
Next, generously coat the canvas with white paint. Use a spatula to get it even.
Before it dries, begin adding various stripes of other colors of acrylic paint. Pour as evenly as possible.
Don’t worry if your pattern isn’t perfect. You will hardly be able to recognize once you begin pulling your design from top-down with a spatula.
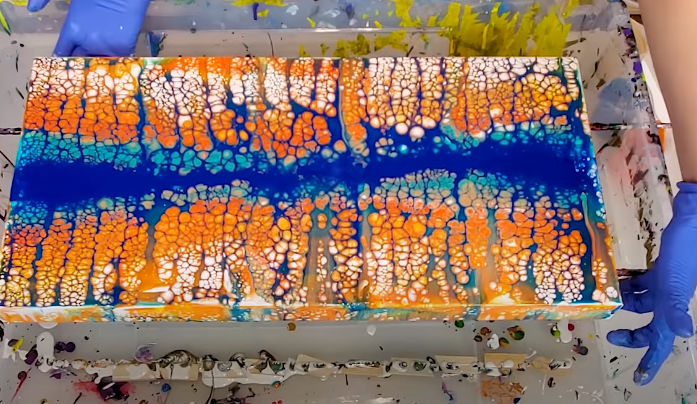
If done correctly, the darker colors will begin to run its course around the lighter colors to create bubble effects throughout. You can help it out by tilting ever-so gradually.
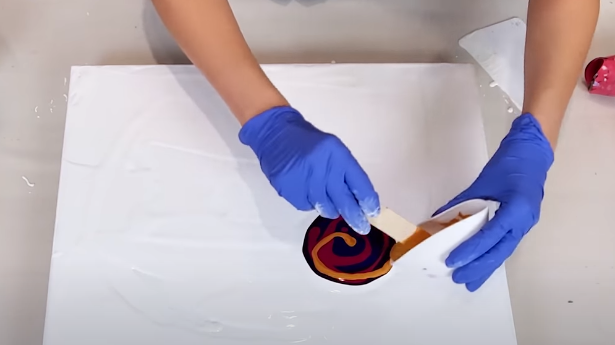
Paint Kiss Acrylic Pour
The paint kiss acrylic pour is one of our personal favorites as it involves a few intricate techniques that anyone can do.

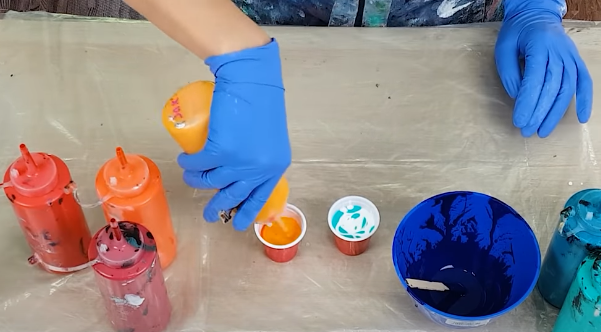
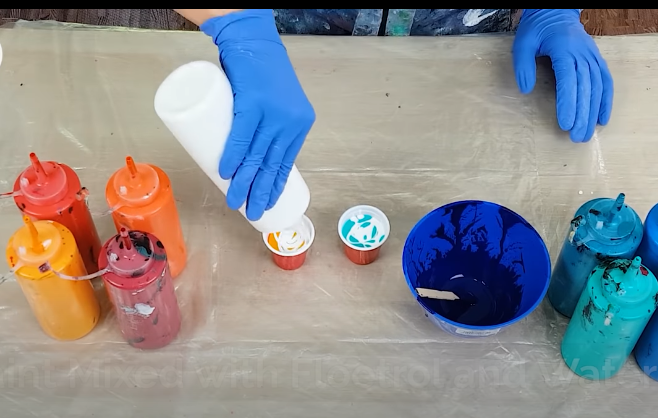
First, similar to other techniques on this list, fill a few cups with various colors of paint. We try to follow a dark-to-light order — usually meaning a layer of white paint is added in the cup last.
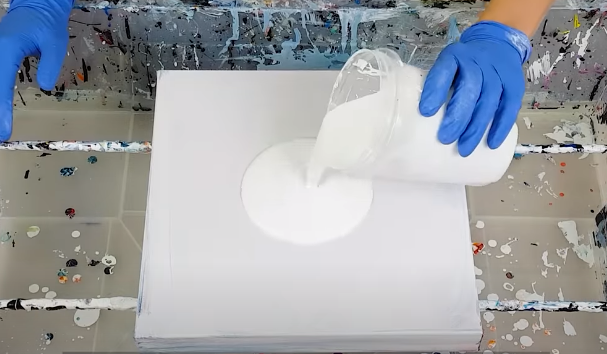
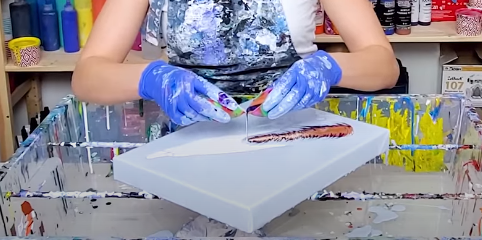
Next, pour a layer of white acrylic in the center of your canvas.
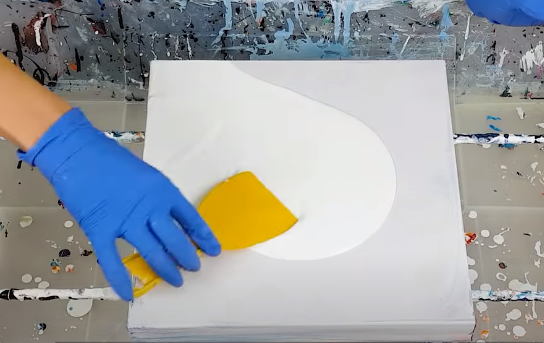
You can use an acrylic paint spatula to evenly coat it onto your canvas.
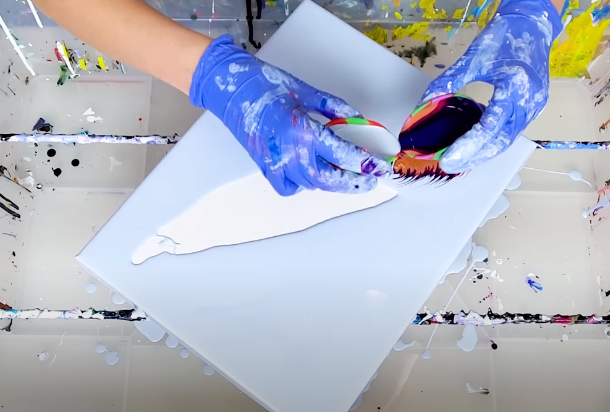
Now, for the fun part. Take a cup of paint mixture in each hand and gently tilt the cups so their rims meet in the center of the canvas. You’ll see this creates an exciting effect on your canvas.
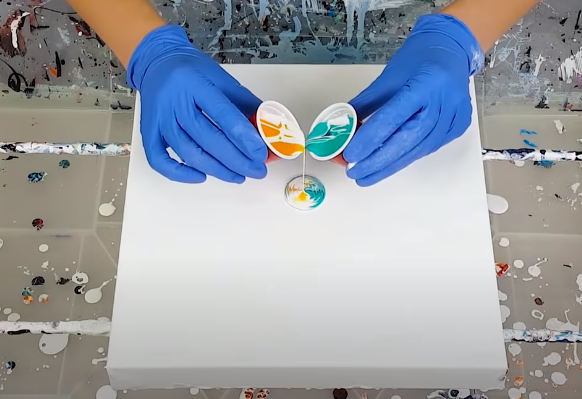
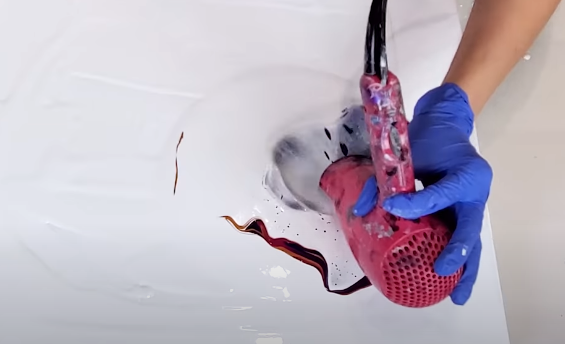
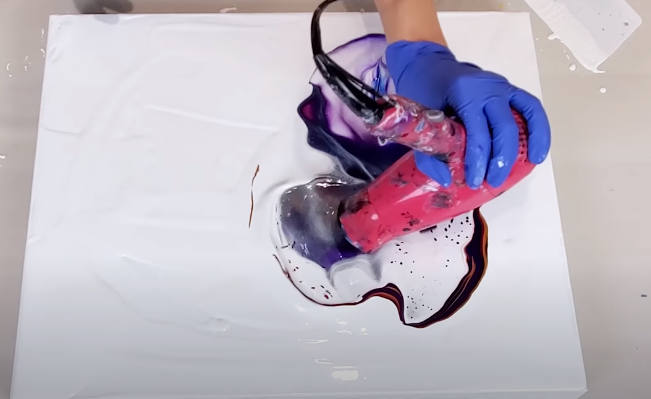
Use this acrylic pouring technique until you’ve poured out the paint for each cup. Try to hold your position as steady as possible while you do so.
This is an optional step, but you may choose to use a hair drier (or any tool similar) to speed up the hardening process.

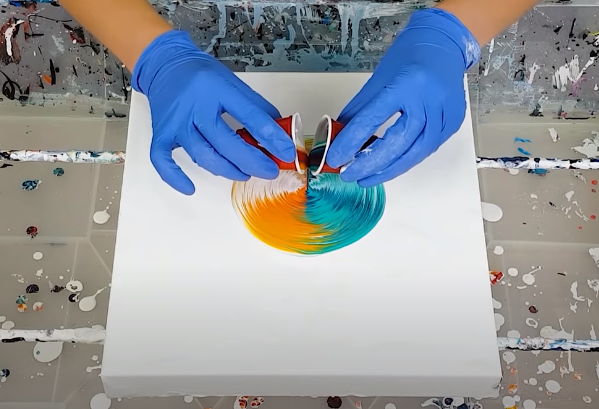
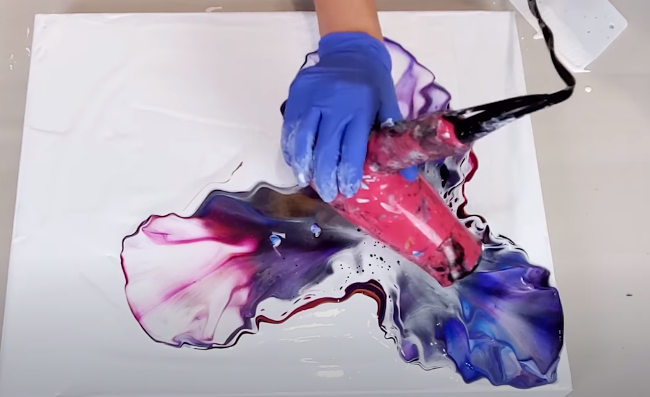
Then, try tilting your canvas with both hands to alter the main pour’s shape. You’ll see most of the pattern follows the direction in which you tilt it, creating a beautiful ripple effect.
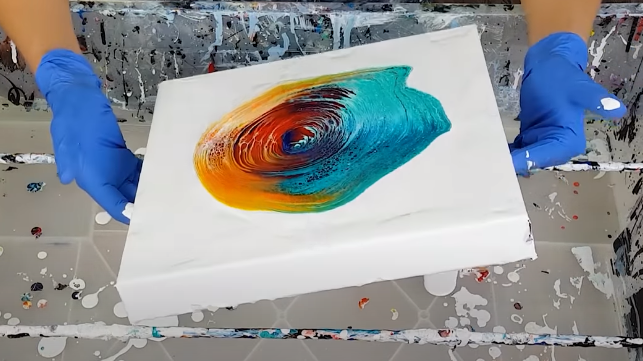
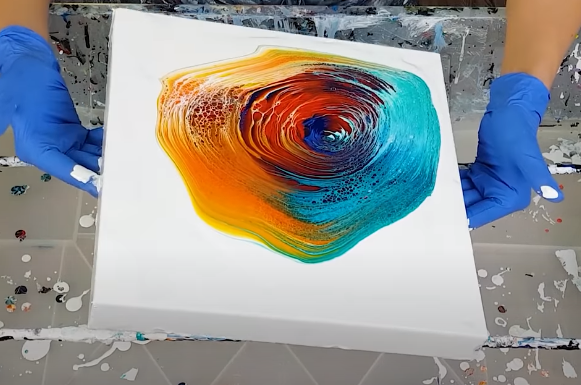
Ready to see something special? Use a straw to push the wet paint to its creative limits. As it dries, you will start to see designs that make this pattern and acrylic technique truly special.
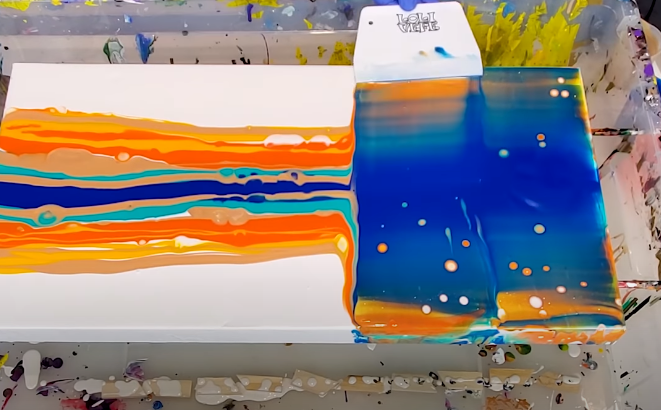
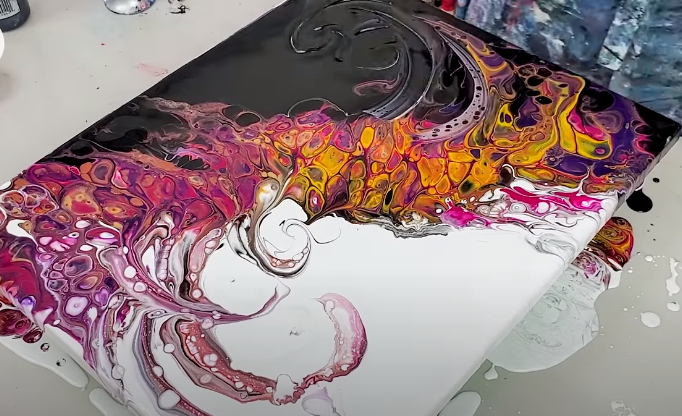
Dutch Pour + Swipe
Start this Dutch pour by evenly coating a blank canvas with white paint using a paint spatula.
Similar to above techniques, we will fill a cone or cup with various colors of acrylic paint – either contrasting or not – that we will then begin to distribute or pour onto our wet canvas.
Traveling Funnel Pour Color Split
In this technique, fill a few small bowls with acrylic paint of differing colors.
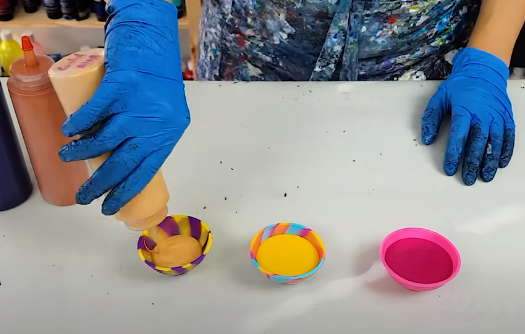
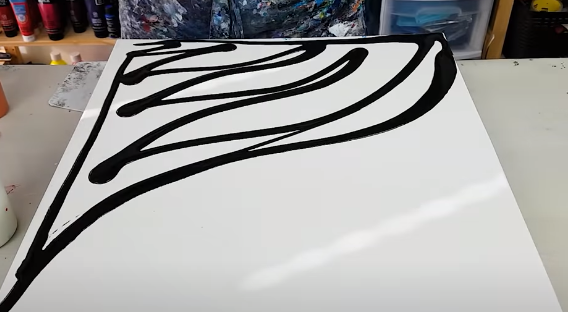
Next, create what we like to call a zebra board which is black and white zig-zags with no rhyme or reason.
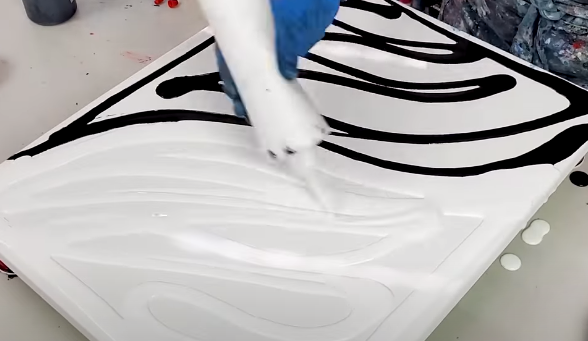
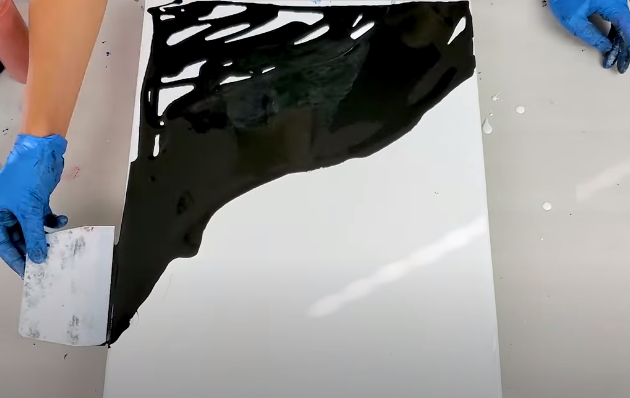
Now, use a spatula to evenly coat the whole canvas.
Do this for both the black and white sides, then, use a funnel down the middle. Load your funnel with various colors with the spout of the funnel held firmly against the canvas so none can escape underneath and onto the canvas while you’re filling the funnel with your off-hand.
Gently lift your hand so the funnel is about 1/8inch off the canvas – just enough to create a unique effect.
Once the funnel has run out of acrylic paint, you can use a knife or tool to uniquely spread the paint into a fun design.
To achieve some of the more desirable effects in this piece, consider using a straw to blow the paint in certain directions and stretch it to its full potential.
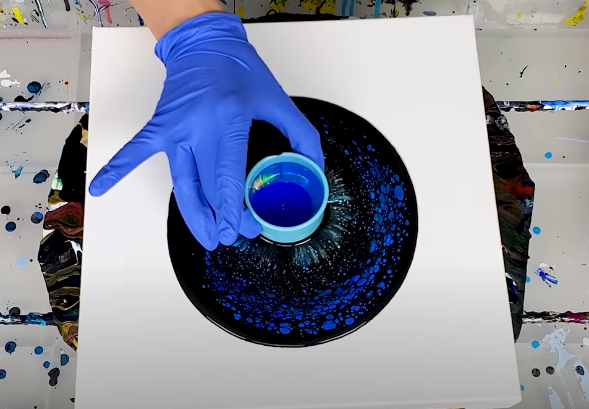
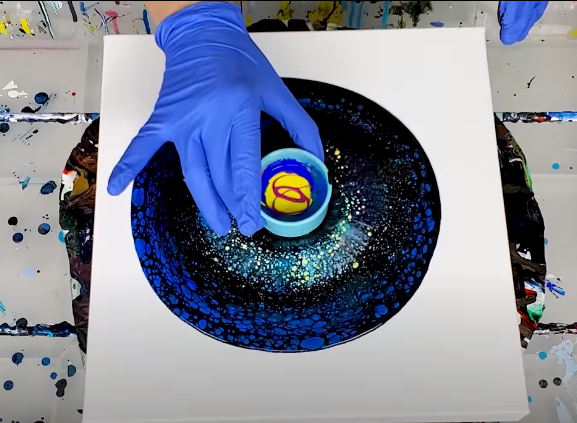
One Cup Pour
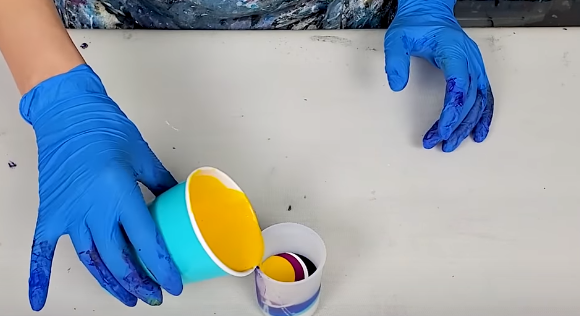
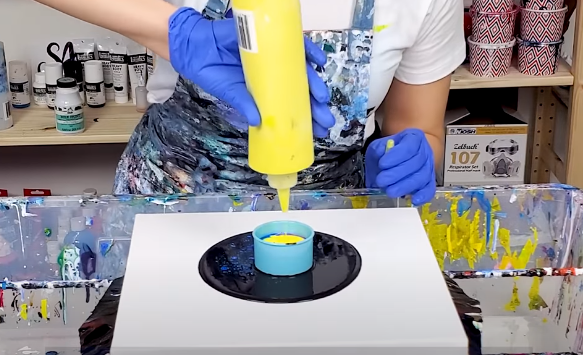
After pouring a centered black circle on your canvas, use a double-sided open cup to fill with various acrylic paint colors.
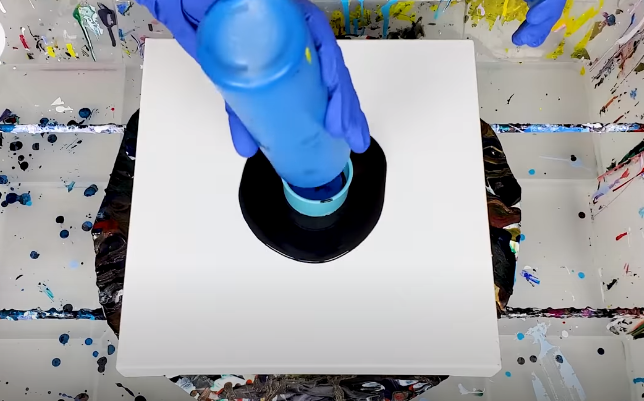
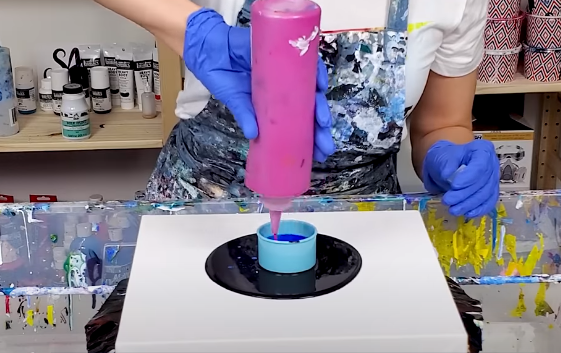
Use a variety of acrylic paints so your work features a wide contrast of colors.
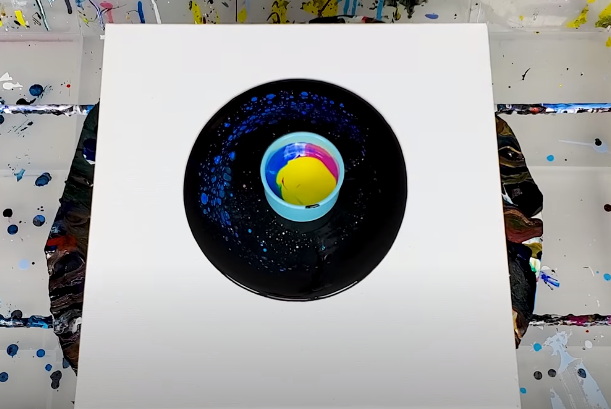
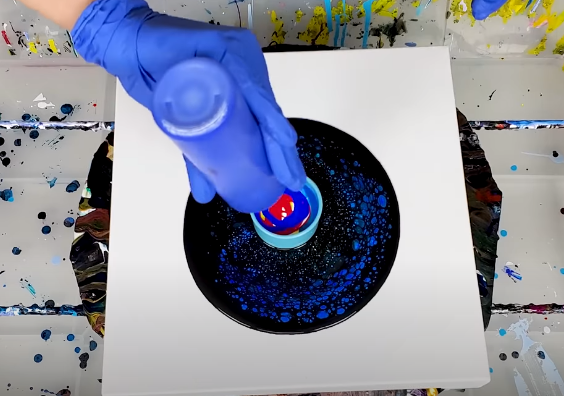
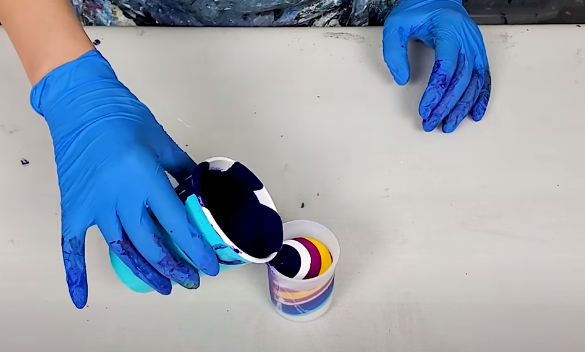
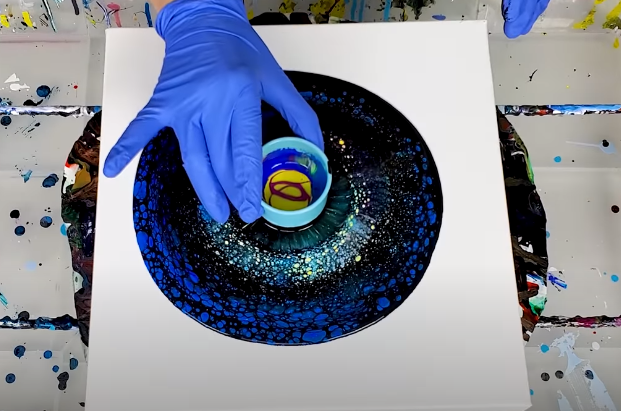
When you’ve filled the cup to the brim with paint, carefully and slowly begin to pick the cup upward off your canvas. You’ll see it tries to hold onto the thick black acrylic as you slowly pull away from the canvas.
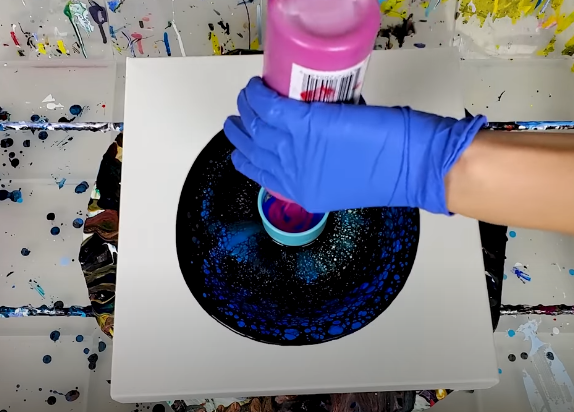
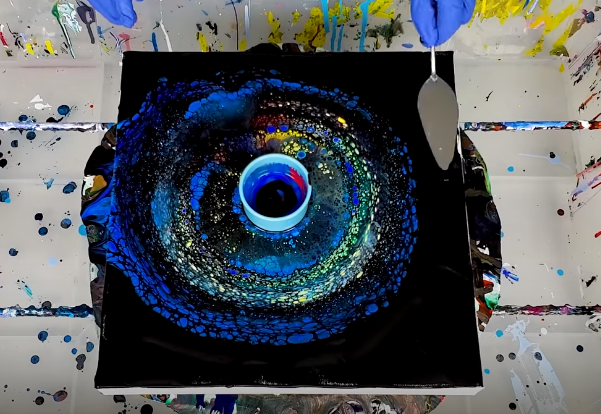
Set the cup back down, fill more paint.
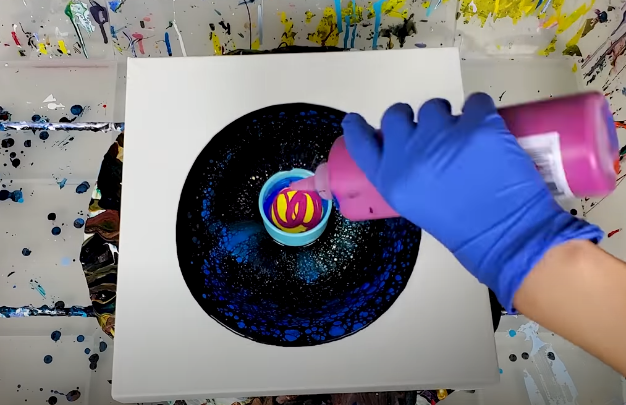
Repeat this process a few times. You’ll see the paint leak its way into the black pour as the black circle expands to the edge of the canvas.
When you’re satisfied with the color you’ve achieved from the leakage, use a spatula to take the black paint to the edge.
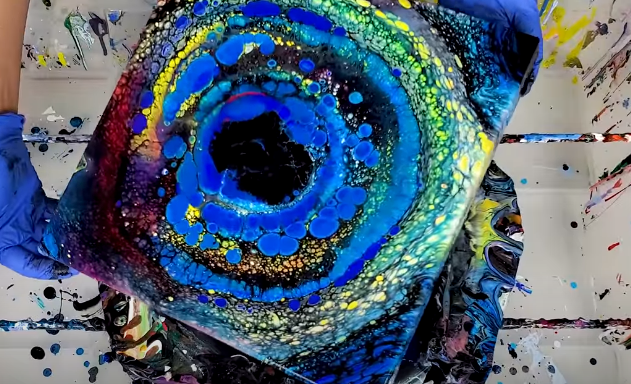
You can use a tilting technique to get more run-off from the colors which have leaked. Slowly, you’ll see more color appear.
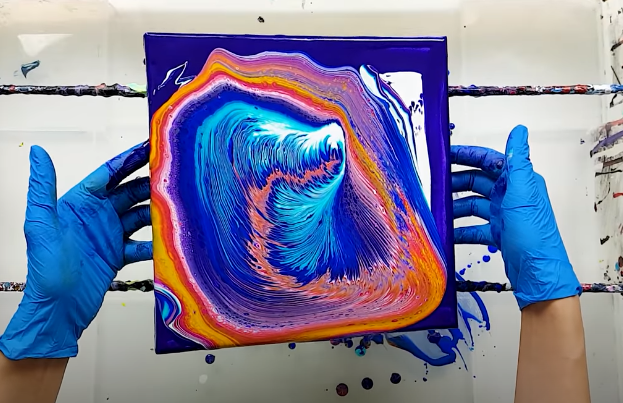
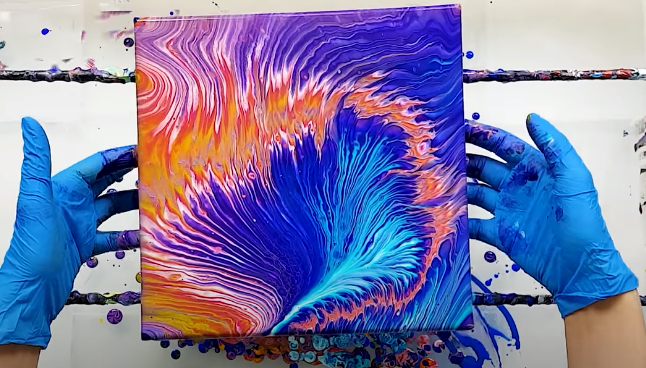
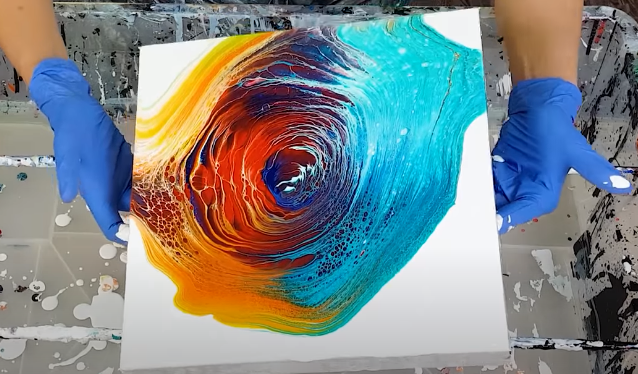
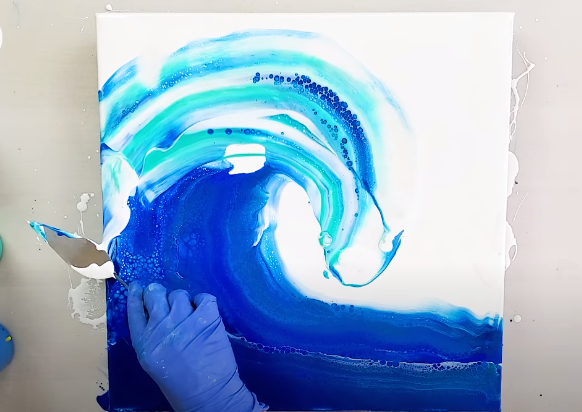
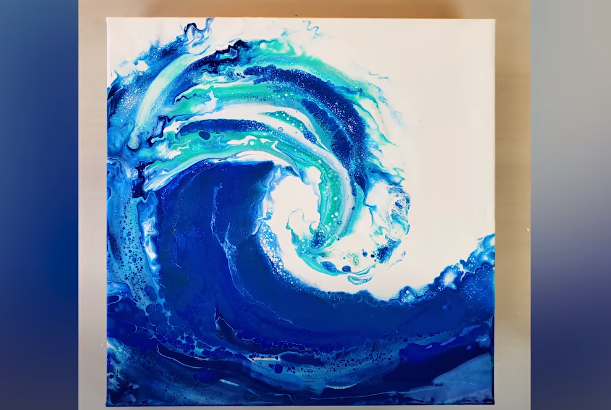
Wave Swipe
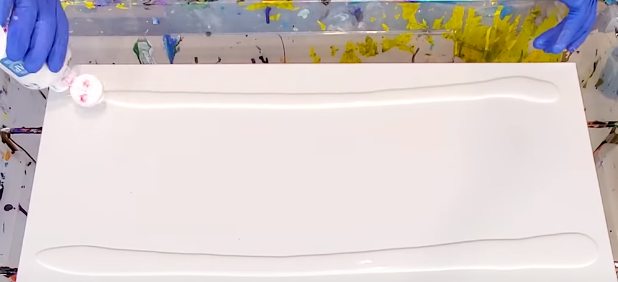
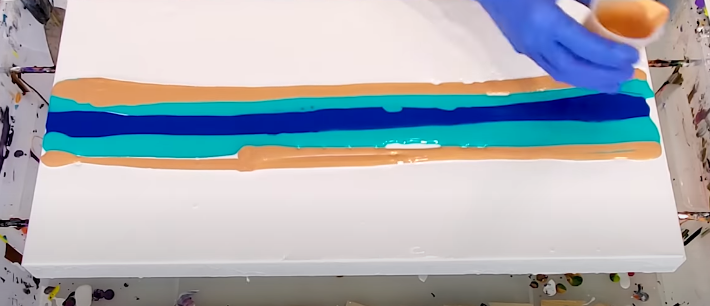
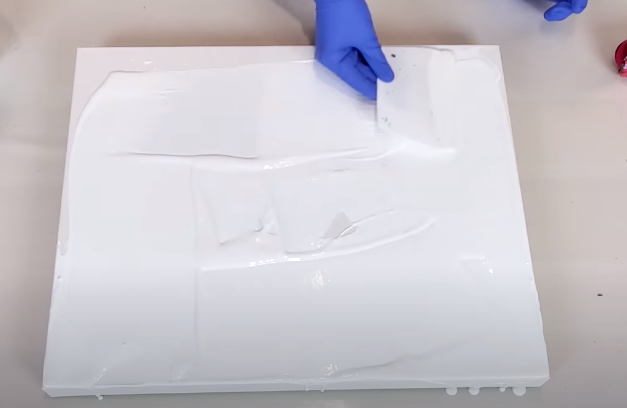
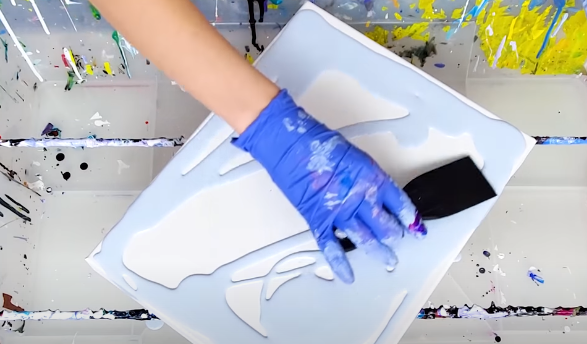
Coat your canvas in lines of various ocean shades with a healthy portion of white covering the majority of the canvas.
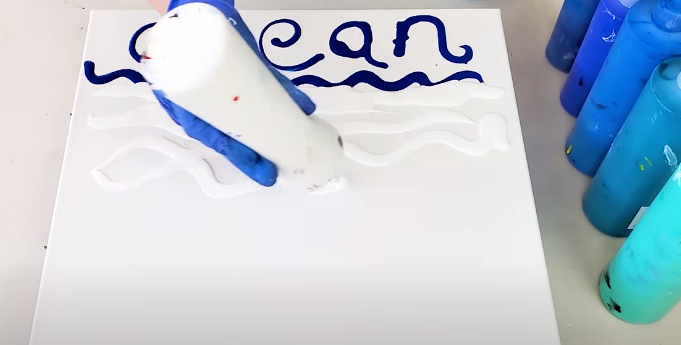
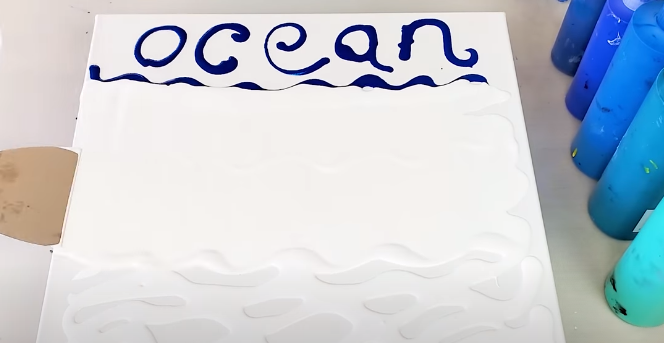
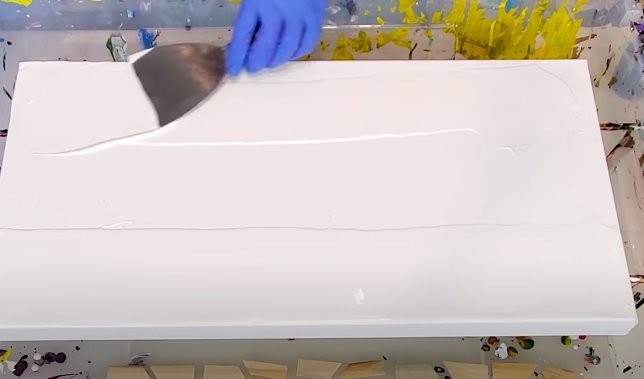
Use a spatula to spread the paint to the edges of your canvas.
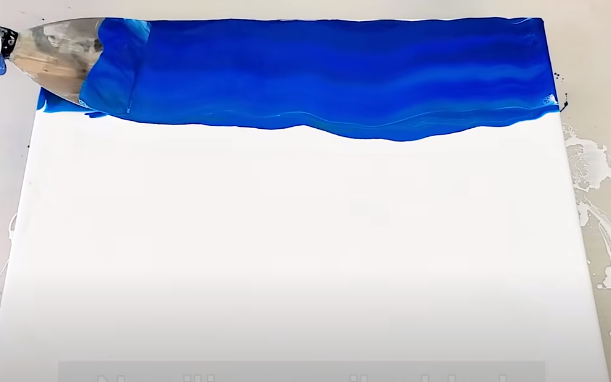
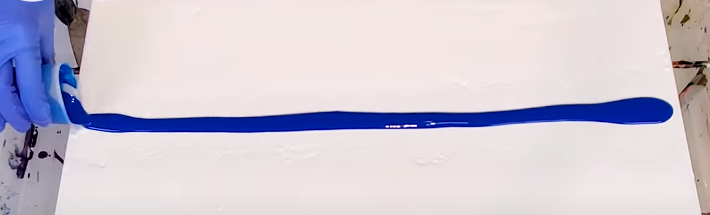
Carefully, you can begin to drag the paint into a more intricate position — such as like waves of the ocean.
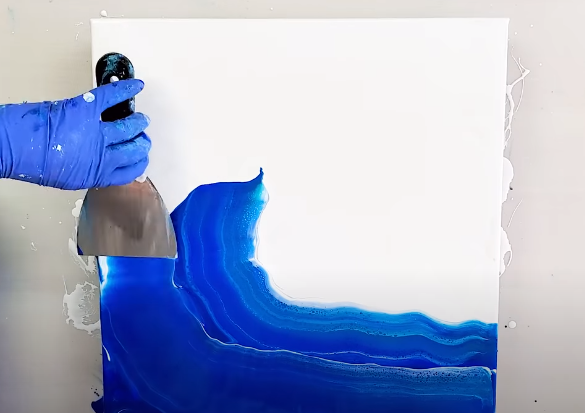
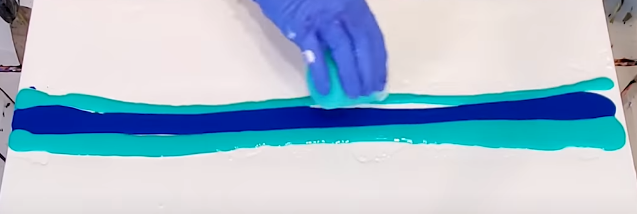
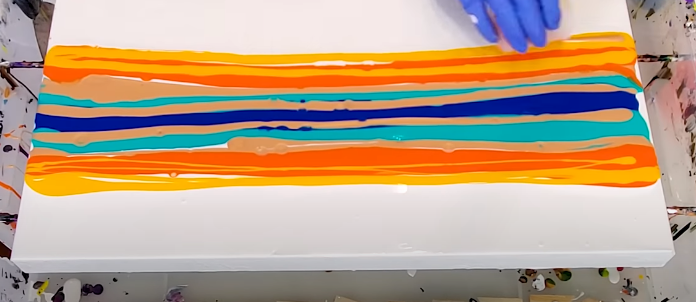
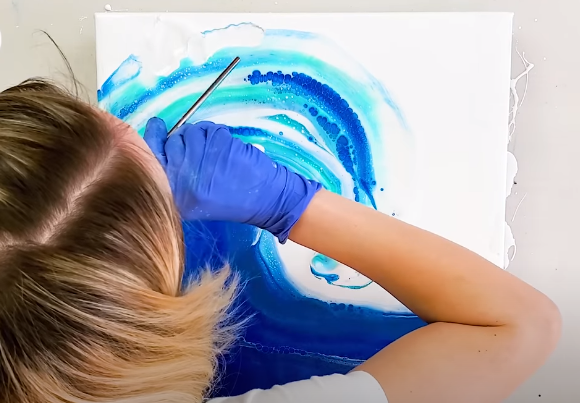
Once you’ve achieved a satisfactory base shape, you can begin to add variances of blue and turquoise to your ocean color.
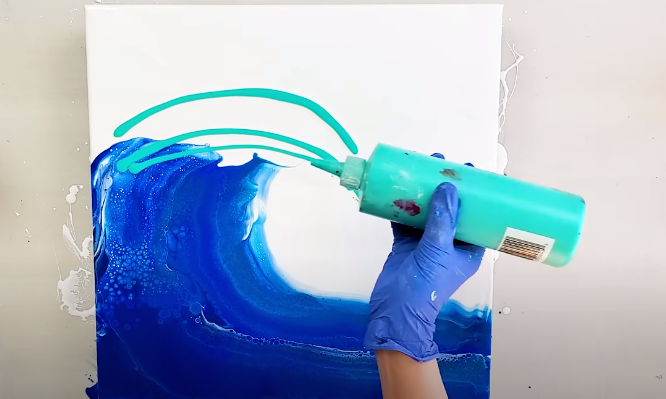

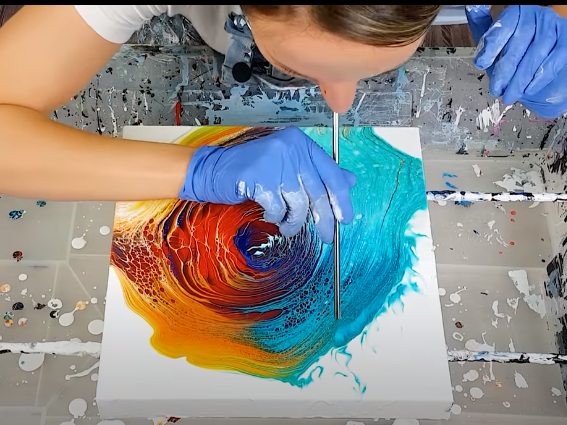
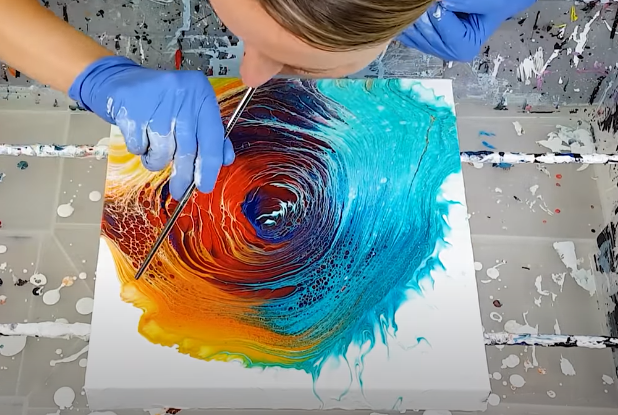
Revert to using tools such as your spatula and blow straw to add details to your work to your liking. There’s no rhyme or reason to this part of the art.
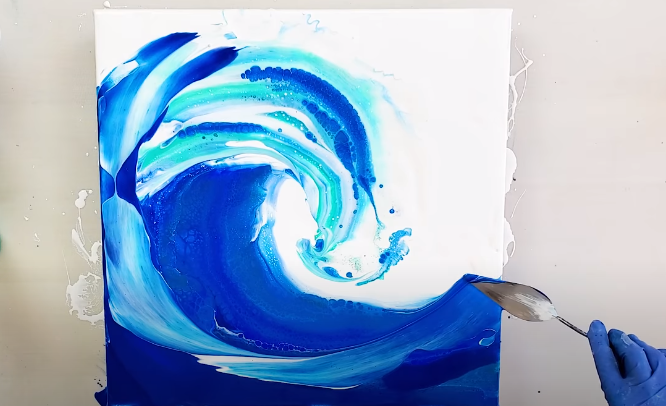
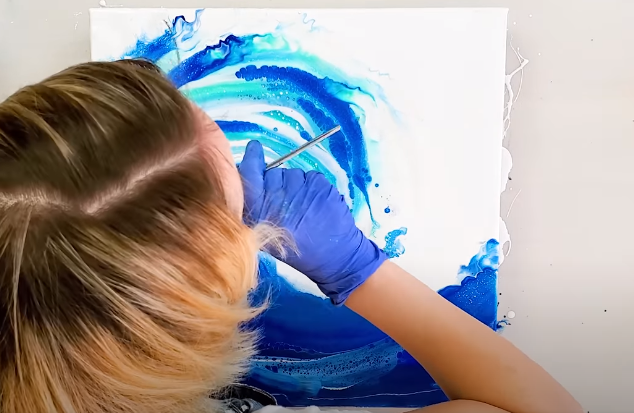
The rest of the painting should be done using trial and error. See which techniques and shapes you can make / like as you go.
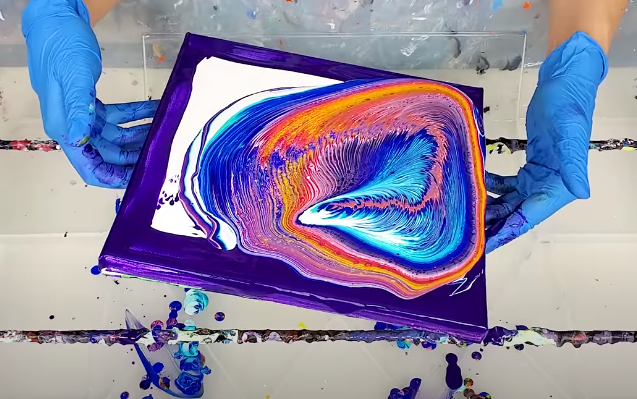
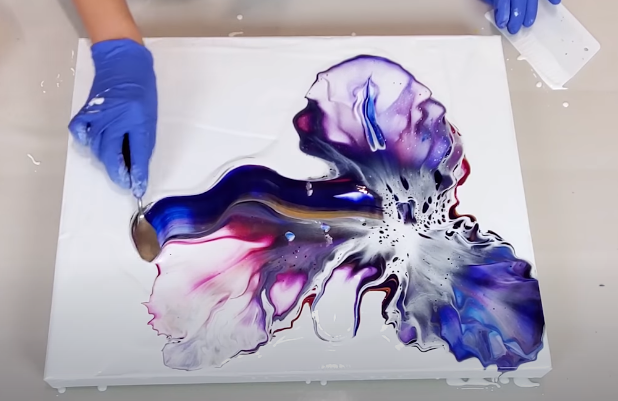
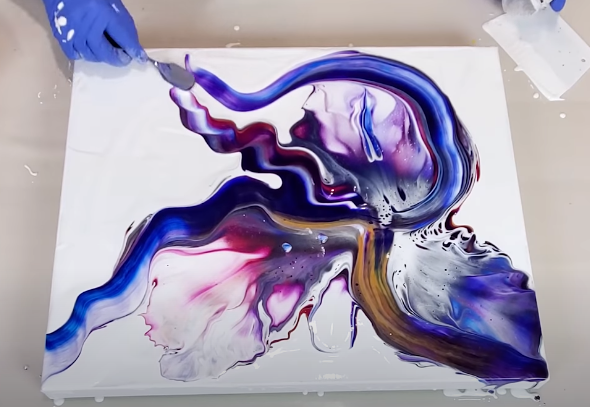
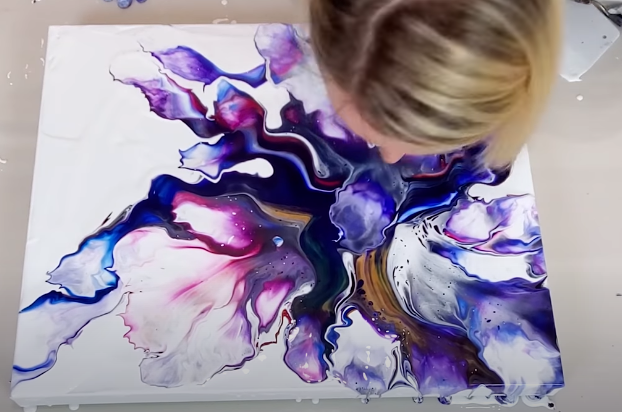
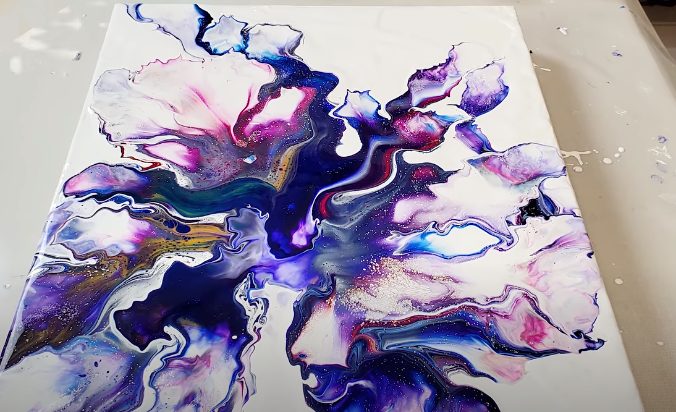
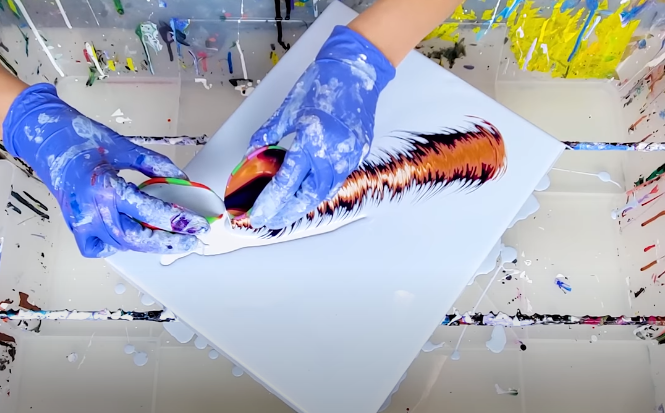
Paint Kiss Feather Pour
Start with an ‘outside-in pour’. This means pour from the outside and use a spatula to spread it around the center (leaving white canvas in the center unpainted).
With a pre-poured mixture of acrylic paint colors, use a paint kiss acrylic pour technique by evenly pouring a white cup and mixed cup of paint together as seen in the photos below as you move across the white of the canvas.
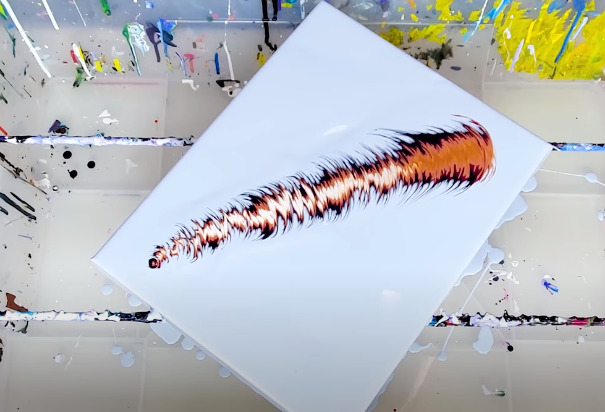
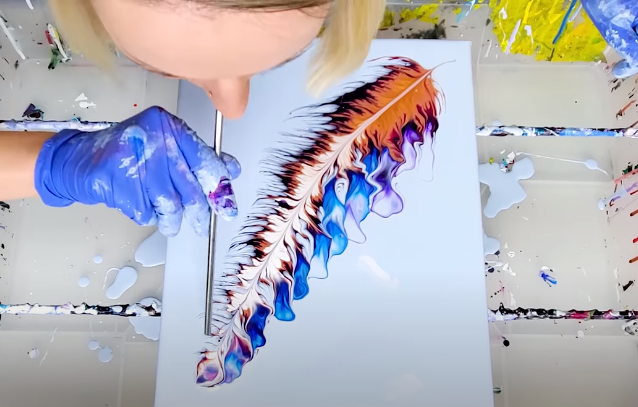
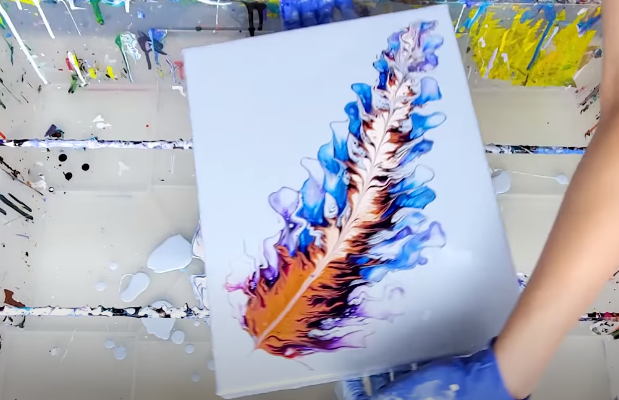
You have the option to use a blow straw to extend this effect at the end of the white space.
Acrylic Pouring Supplies
- Pour Painting Surface:
- Wood Panels
- Ampersand Gessobord Panels
- Stretched Canvases
- Paintbrush
- Acrylic Paints
- Acrylic Pouring Medium
- 100% Silicone for Acrylic Pouring
- Plastic Cups
- Palette Knife
- Squeeze Bottles
- Disposable Gloves
- Straw
- Hairdryer
- Tarp
- Apron
- Paper Towels
- Spoon
Acrylic Fluid Painting vs Acrylic Paint Pouring
Pouring is one of many Acrylic Fluid techniques. So, essentially, fluid acrylic painting and fluid acrylic pouring are the same thing. Pouring is just a variation of fluid acrylic paint.
What is an Acrylic Pouring Recipe
An acrylic pour recipe is the list of ingredients and materials needed to create a piece of acrylic pour art such as the acrylic pouring supplies listed above.
Acrylic Pouring Techniques for Beginners
Now that you have a better understanding of some of the acrylic pour techniques, perhaps it’s time to get started.
Feel free to share your work with us in the comments below. We love seeing pictures from our readers!