So, you’ve come here looking for some paintings of birds in acrylic? Well, you’ve found the right place. Today, we will be looking at how to paint Macaw Parrot in acrylic and we’ll be working on classic canvas.
Thanks to Shwetha for the help putting this beginner tutorial together. Make sure to follow her on Twitter to support her help on this step-by-step painting tutorial.

How to Paint a Bird in Acrylic (Macaw / Parrot)
Let’s get started!
Step 1: Prime the Canvas with Gesso
This step is typical in acrylic, but we thought we’d mention it to start anyway.
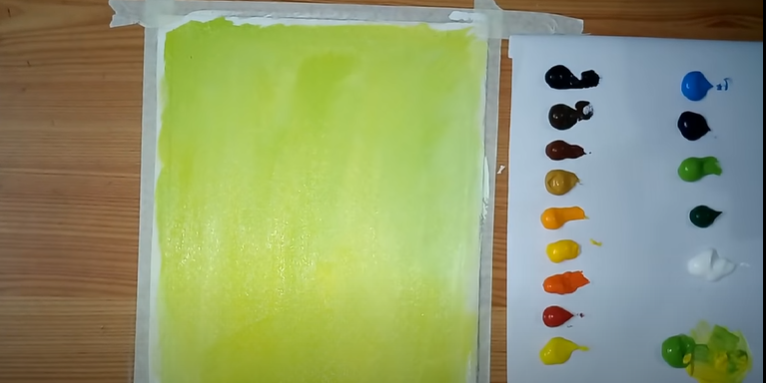
Step 2: Green Shade
Next, lightly shade the entire canvas with a light green acrylic paint. You may feel obliged to add some white highlights throughout your shading. Feel free!
Note: All colors used in the tutorial today are completely optional. Feel free to add whatever creative touch you’d like to your piece whether that is extra feathers, different colors, or something completely different.
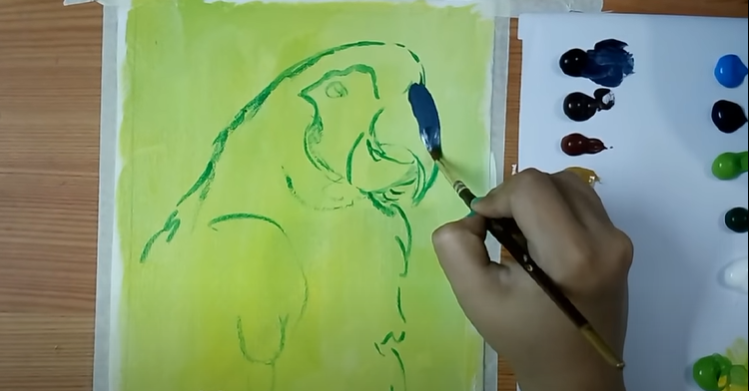
Step 3: Outline the Bird
Next, begin outlining the shape of your bird using a pointed-tip brush. These lines should be fine as they are meant to be free-handed. Take this step slow, don’t rush your hand movements or gestures, but don’t over-complicate the design either. It doesn’t particularly matter what color paint you use for this step. We’ve chosen a darker shade of green.
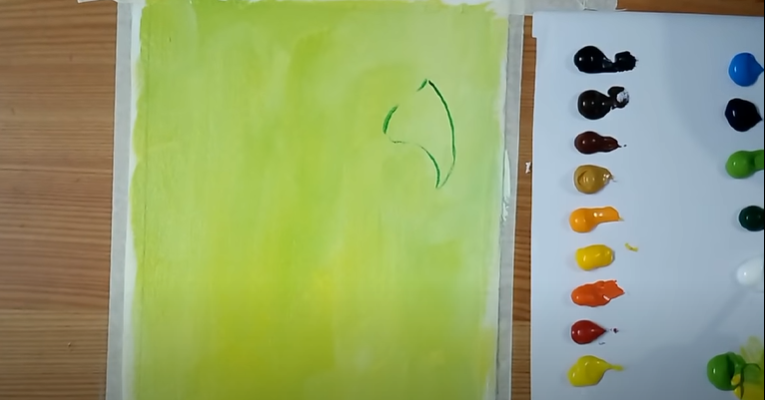
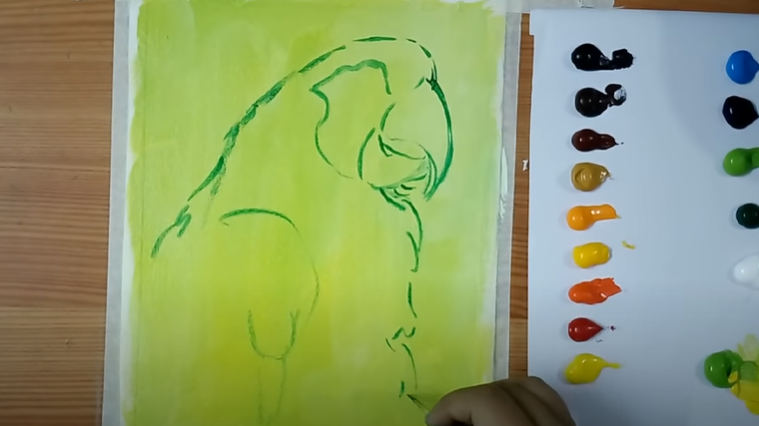
Note: This isn’t supposed to be an end-all-be-all set-in-stone final shape for your bird. Just the start. . .
Step 4: Fill It In
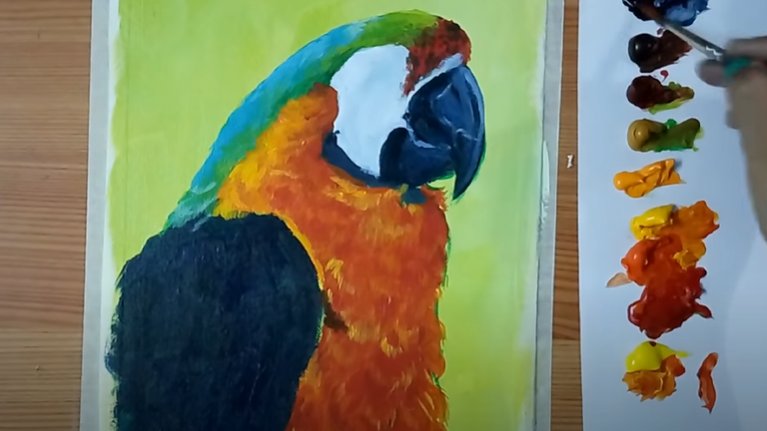
Start filling in the base tones of the bird accordingly. Your parrot is going to be colored with many fluctuating tones, but try to stick with what you see as the base tones to start. These are usually centered around the primary colors on the color wheel.
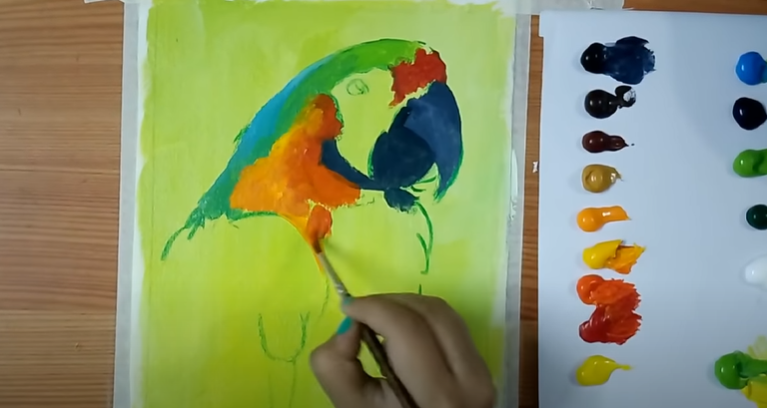
You’ll see you can begin to use a mixture of the basic tones to create variations of the colors. Beginners may want to practice their acrylic techniques before diving too far into this step. If you’re comfortable with mixtures, jump right in!
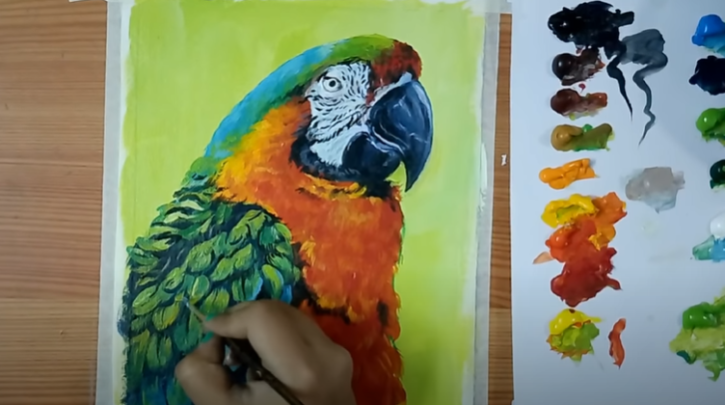
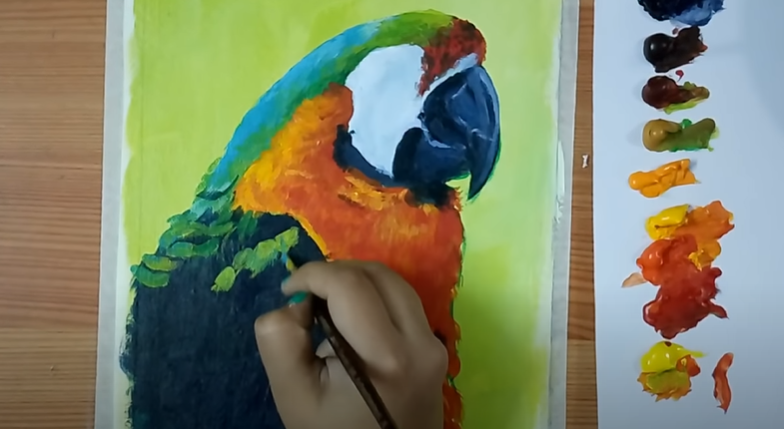
Step 5: Detail the Bird
Begin to add finer details to your Macaw/ Parrot by using lighter and darker tones such as white and black.
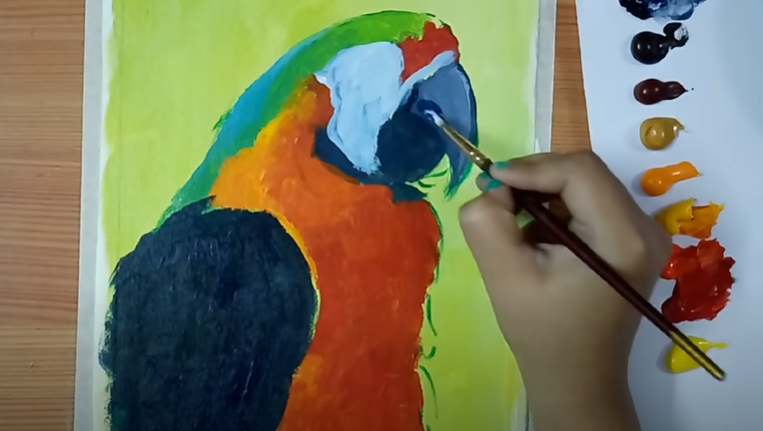
To add details like feathers, try using a small round-tipped brush. This will make those messier details easier and more natural-looking. Remember to darken wherever necessary.
Soon, you’ll be able to start adding contrasting details to your bird; mainly color variations such as the green on the wings below:
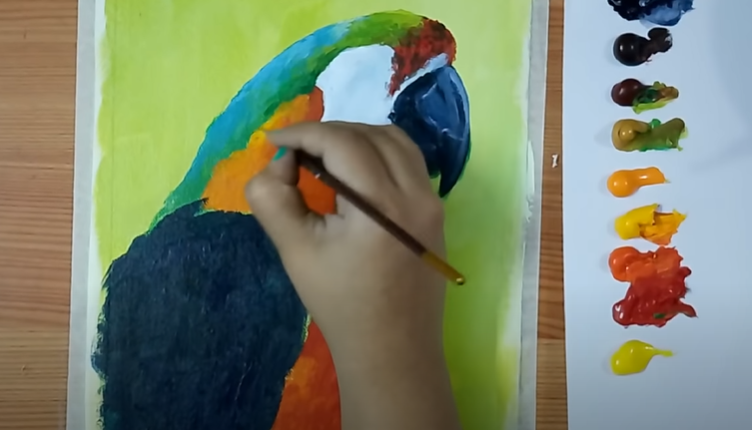
Step 6: Add More Highlights and Shadows
To add to the realisticness, feel free to add highlights and shadows to the feathers of the bird. This is an easy step you can take to bring your acrylic painting to the next level.
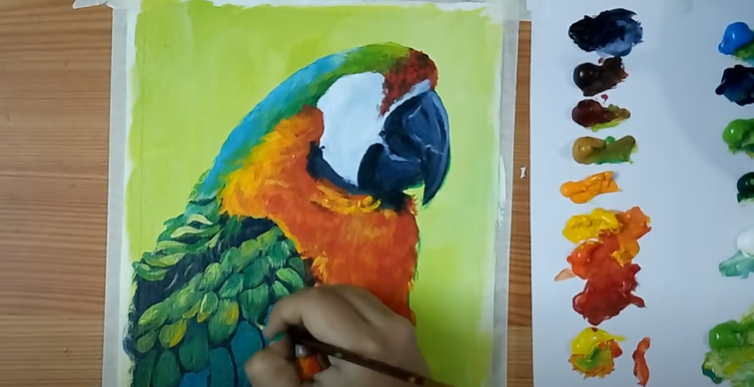
The more experienced you are, the more detailed you can expect to make it in this step.
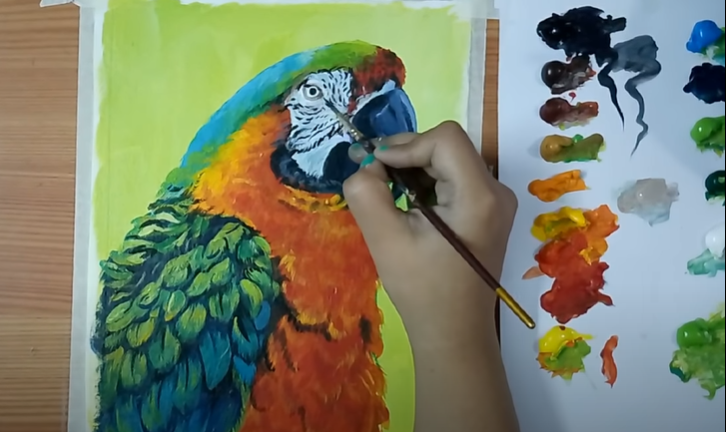
Step 7: Add Finishing Touches
Finally, add finishing touches such as facial features to your Acrylic Bird Parrot / Macaw. Again, with more experience, you will be able to touch it up to your liking.

You Painted an Acrylic Bird!
Well done. We are anxious to see your finished piece. Feel free to share it with us as a photo in the pictures below. We hope this was helpful for you.
Happy paining 🙂
Thank you for this tutorial, it was very easy to follow. I want to paint a series of bird paintings and this is a good place to start.