In this tutorial, we will take you step-by-step to learn how to paint leather shoes. One of the hottest trends today is leather shoes paint.
It gives you the distinct possibility to make your shoes your own. Adding flavor and colors that aren’t always available for purchase new, you’re able to paint your style on your kicks.
Thanks to Jacob for his help in putting together this tutorial. If you haven’t come across his work, feel free to follow him on Twitter for creative inspiration. He’s a great artist.
Follow along and feel free to use some aspects of Jacob’s design while you paint for leather shoes of your own.
Supplies needed to paint leather shoes

- Glass cup
- Cotton balls
- Soft brushes
- Finisher
- Fabric or cloth to apply finisher
- Water
- Leather paint for shoes (Angelus Paint for best results)
- Leather shoes
- Design ideas
- Rubber gloves
- Acetone
Note: If you’re looking for Leather spray paint for shoes tutorial, that is another option much more technical. If you’re a beginner, perhaps you stick to acrylic brush painting on leather first.
Prepping the shoe
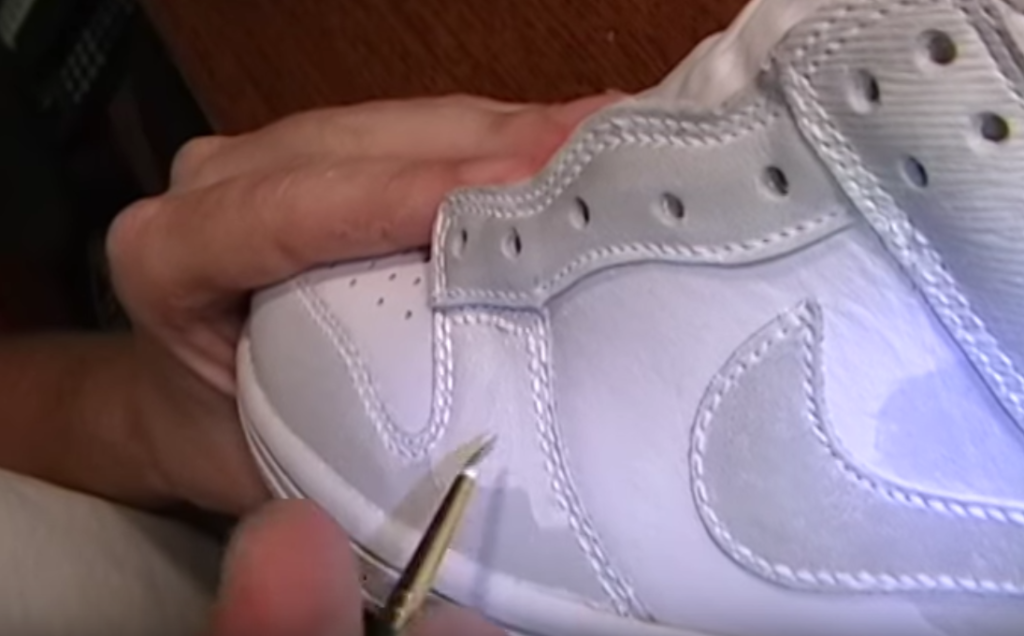
Let’s start with a little prep work. Understand that you should work from the light colors to the darkest colors. Therefore, lay your white coat (or whatever is your lightest color) first.
From there, you’d work to your second lightest color. In this tutorial, yellow is it. Finally, you’d move to the dark colors or, in this case, red.
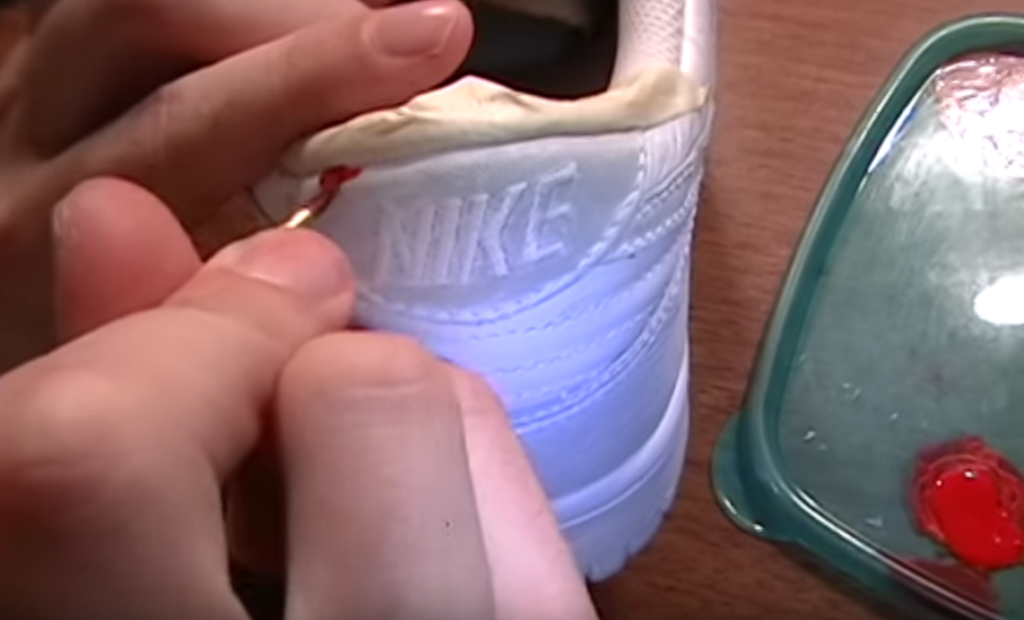
Everyone has their own methods for how to paint leather shoes, but generally we like to follow Jacob’s lead on this one. Cover your edges first. This means, paint section-by-section.
This will depend on your design, but gradually you’ll get better at your painting approach. It’s simple!
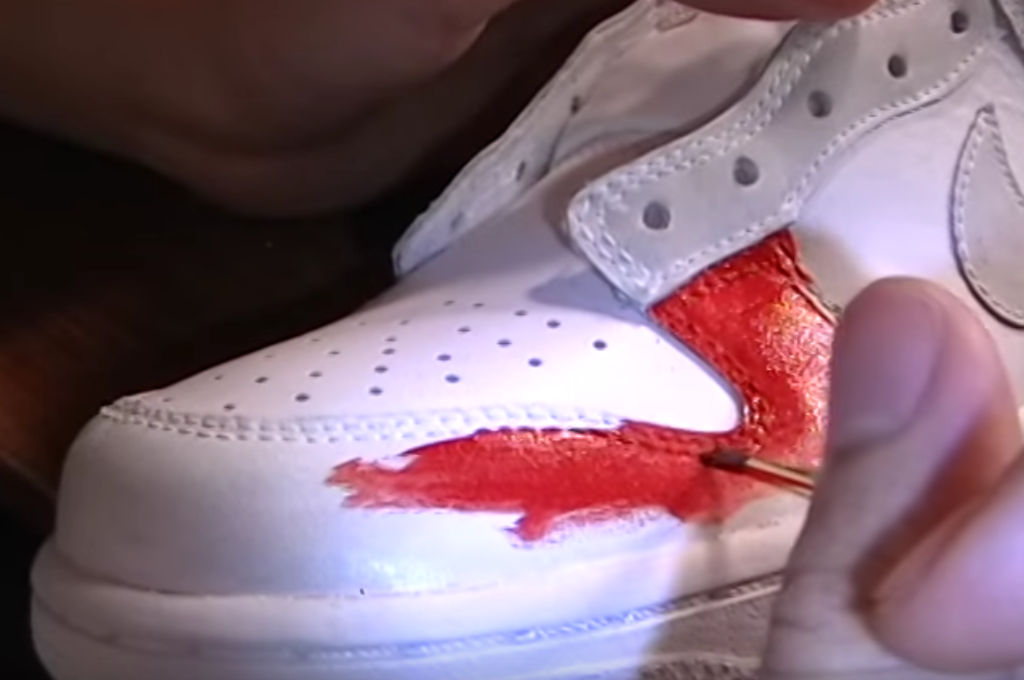
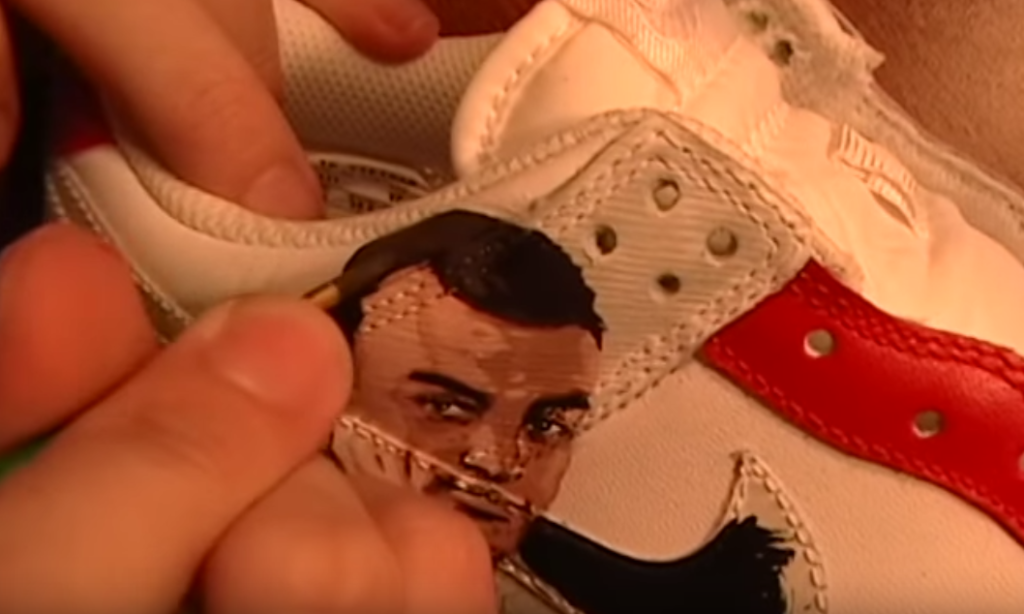
Once you have the edges of each particular section painted, you can begin to fill in the section with the appropriate color. Take a look at Jacob’s first few sections below.
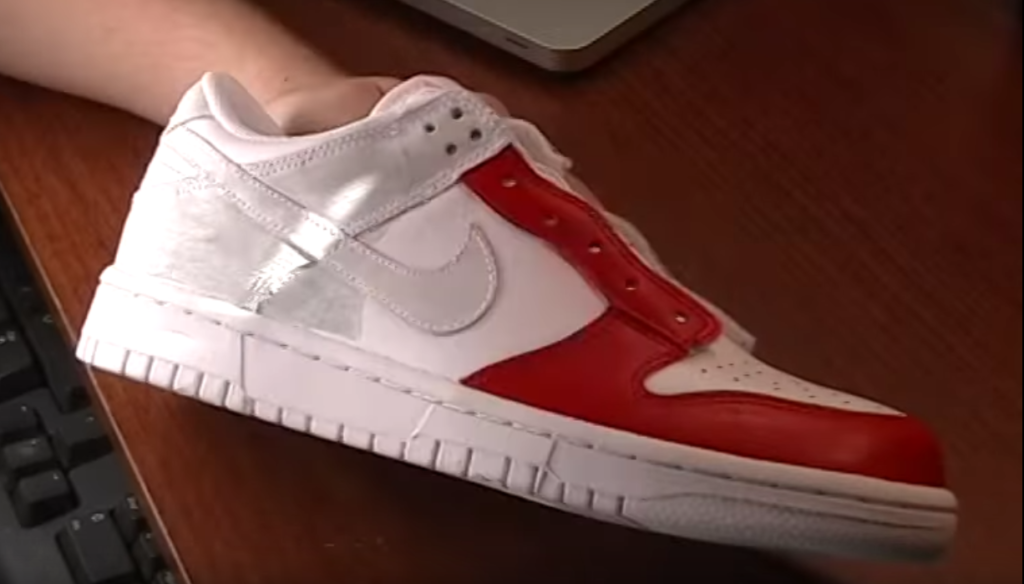
Design on the prepped shoes
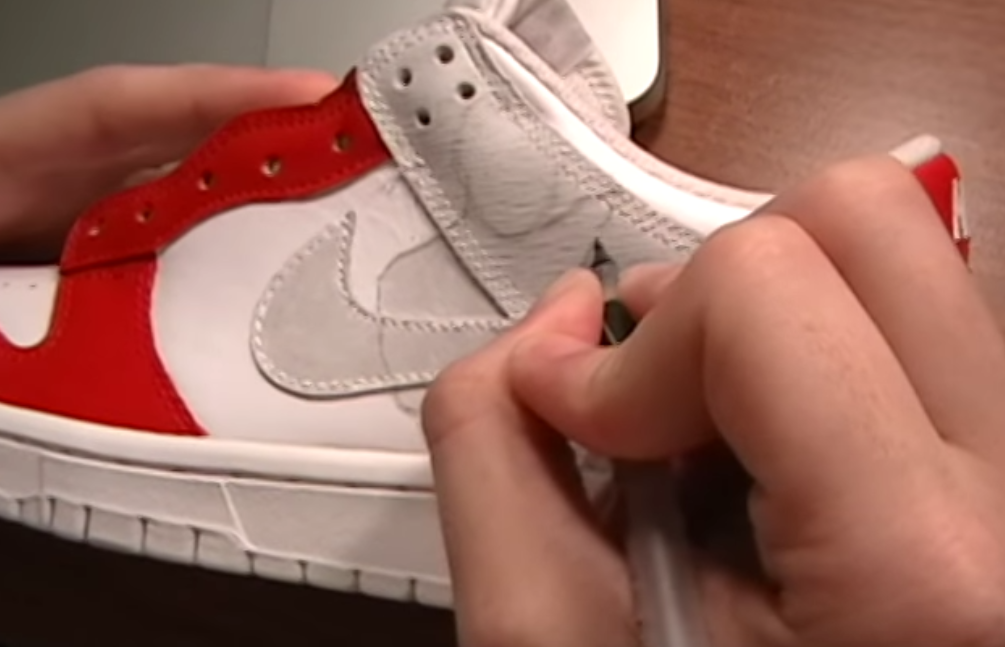
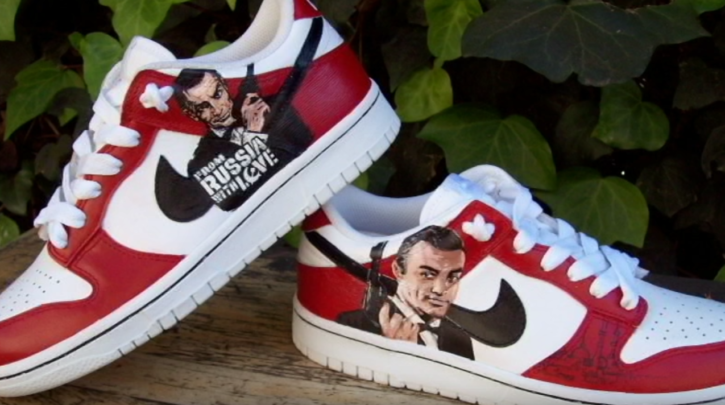
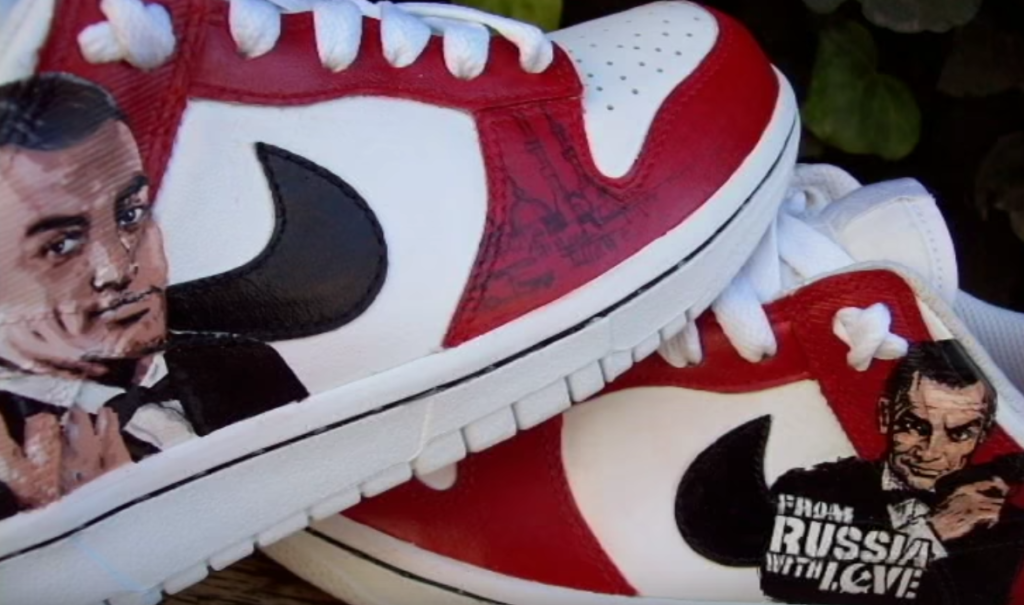
The white was our base paint. The red is a sort of eye-popper. Now, Jacob will begin to draw his design. This is where your true artistic expression can shine. Your inspiration can come from anywhere.
One wouldn’t normally suspect a portrait to be painted on shoes, but as you will see, it can really bring the shoes to life.
That’s the value in painting leather shoes. It gives you unlimited creative options. Take advantage of it and don’t be afraid to let your style show.
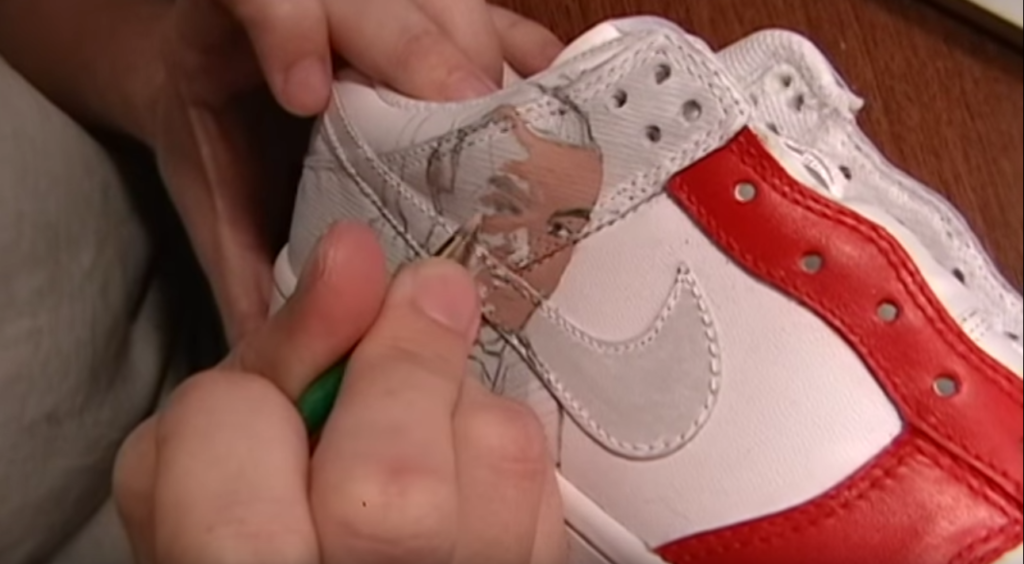
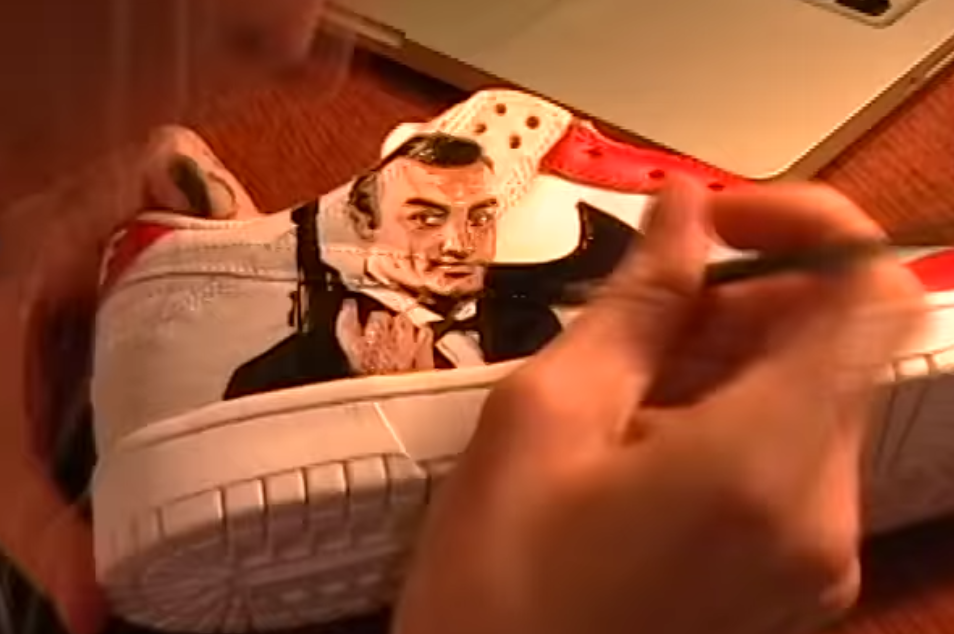
Painting on the prepped leather shoe
As you can tell, Jacob didn’t paint from light to dark. The most important part is to paint white first. He then added a layer of red. We don’t recommend this as a beginner because it’s hard to tell how the colors will blend.
However, if you must, it’s a good rule of thumb to let the paint dry for five minutes between each layer.
Prepping the shoes is the most important step of leather shoe painting, don’t be too impatient.

Paying attention to detail can save you lots of time in the long run. Take time to plot each stroke and the order in which you paint the shoe. It will be less messy that way.
Generally, the more detailed the design, the longer you will want to wait for each layer to dry.
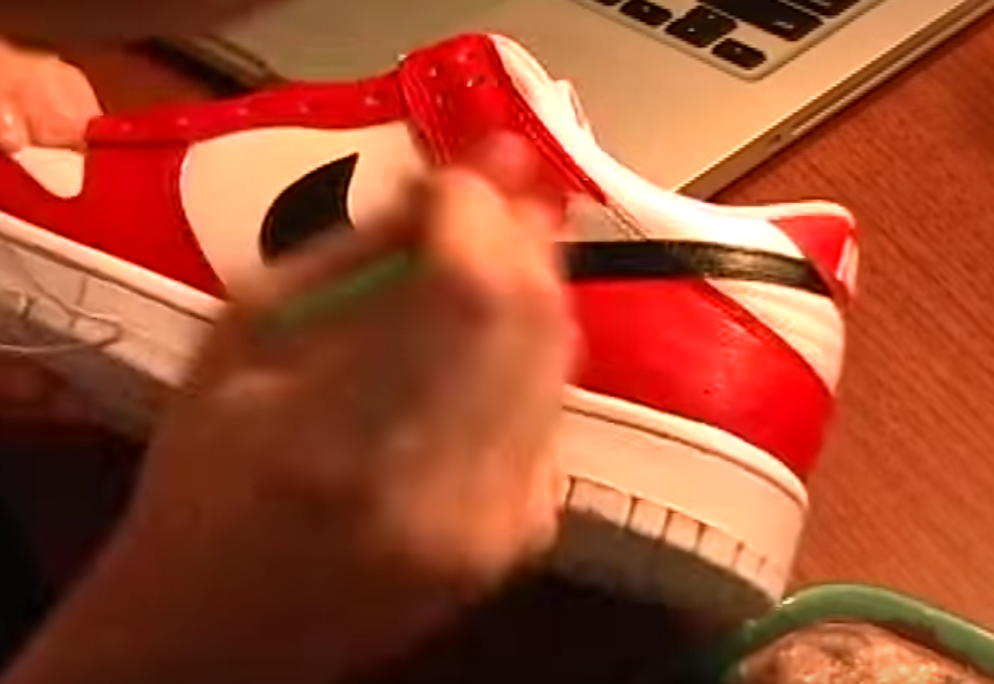
There are also many technical aspects to leather shoes paint. You can add shadow and highlights no matter if it’s a portrait or a pattern.
Once you finish your design, don’t forget to put the finishing touches on your paint job. This can include darkening or highlighting the logo of the brand of the shoe if you want. You could also color things like the shoe tag for added personality.
Some like to paint the sole of the shoe, others leave it. Depending on the condition of the shoe, you can decide on your own.
Once you finish, you may want to apply a finisher to your shoes
This last step isn’t necessary but it will preserve your design longer. Remember, if you are going to wear your shoes after painting them, they will suffer normal wear and tear.
Your art and paint on leather shoes isn’t supposed to last forever, but a good finisher can make it last much longer and look cleaner.
If you had fun painting leather shoes, check out our tutorial with canvas shoes. You’ll love it.
Remember to subscribe to our newsletter as we often send great deals on acrylic supplies straight to your inbox.